Lachha Paratha


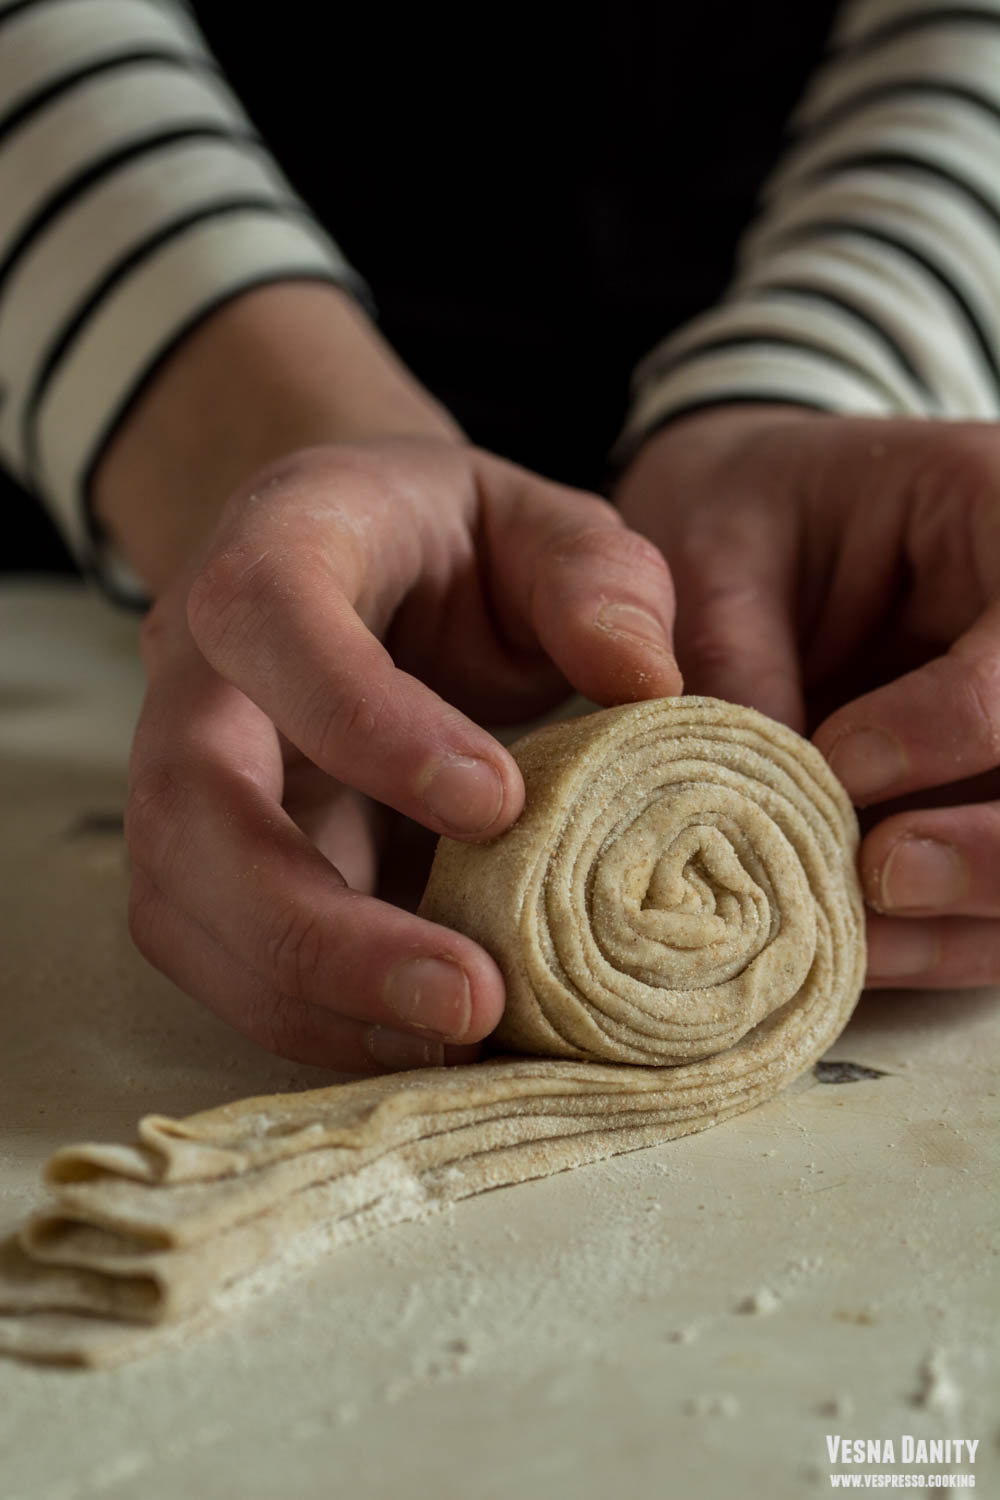
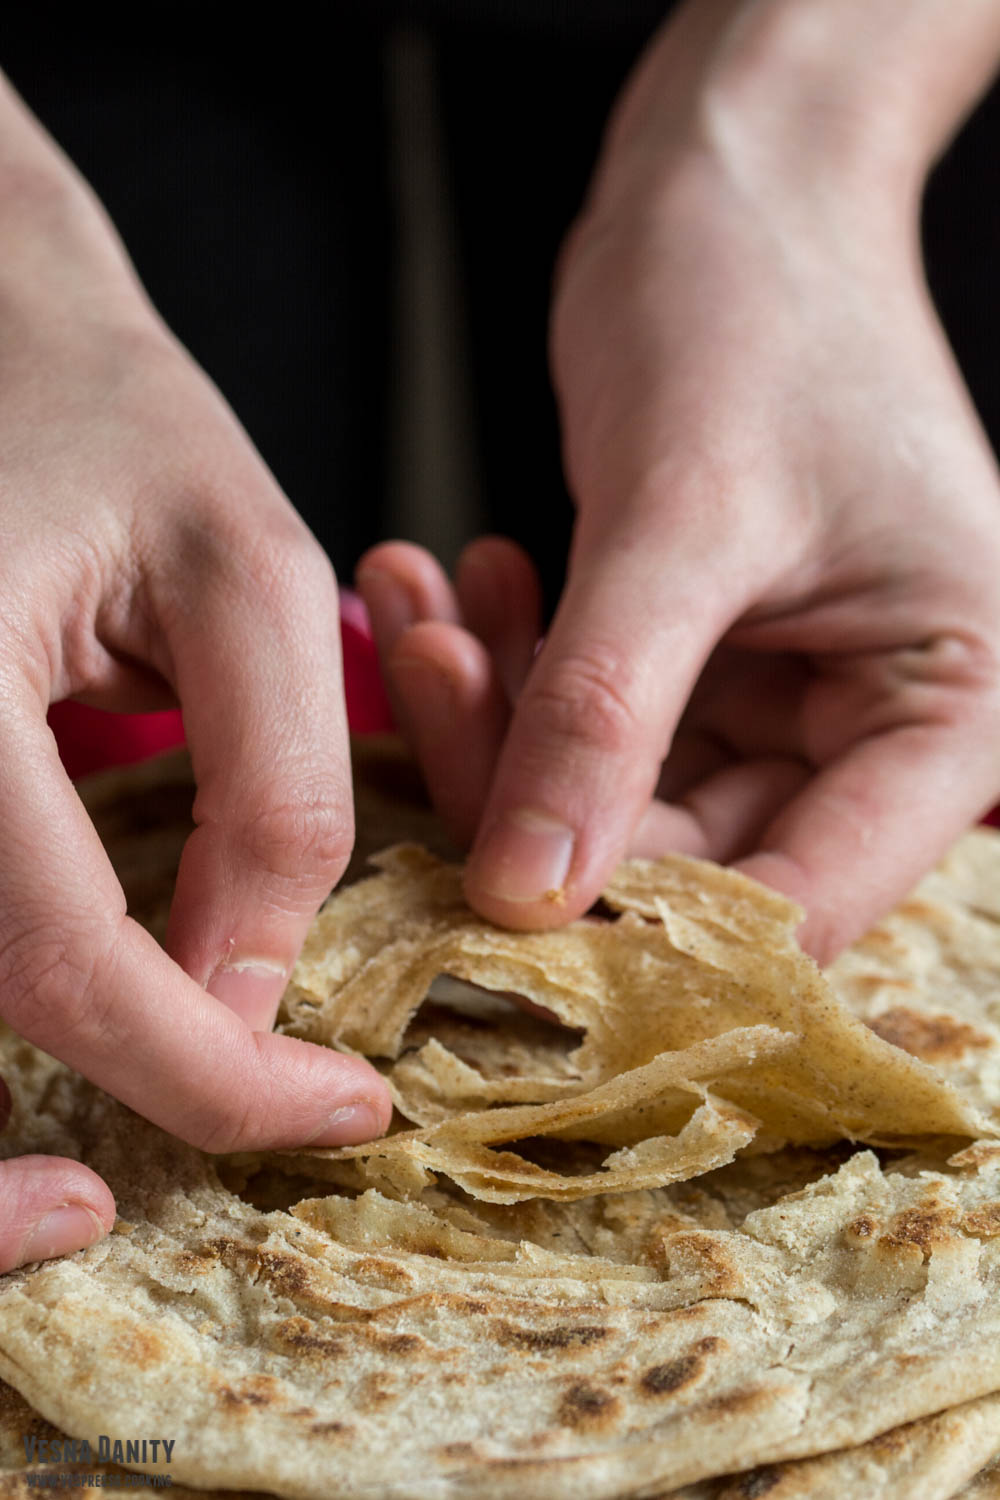
Lachha paratha is an Indian multi layered flatbread. For this simple recipe you’ll only need a handful of budget-friendly ingredients. The dough for lachha paratha is a mix of flour, water and oil, with a pinch of salt and sugar. After the dough has rested for a while, it is divided into 6 balls, and each ball is flatten into a disc with a rolling pin. And this is where the magic begins. Each disc, after being brushed with oil and powdered with flour, is folded into a fan and the fan is shaped as a pinwheel. Each pinwheel is flatten with a rolling pin into a flatbread. All the steps mentioned above are responsible for those lovely, flaky layers of goodness. Lachha paratha is more labor-intensive than a regular flatbread, but the result is absolutely spectacular; these multi layered flatbreads are not only a feast for the taste buds, but also for the eyes (and even for the ears).

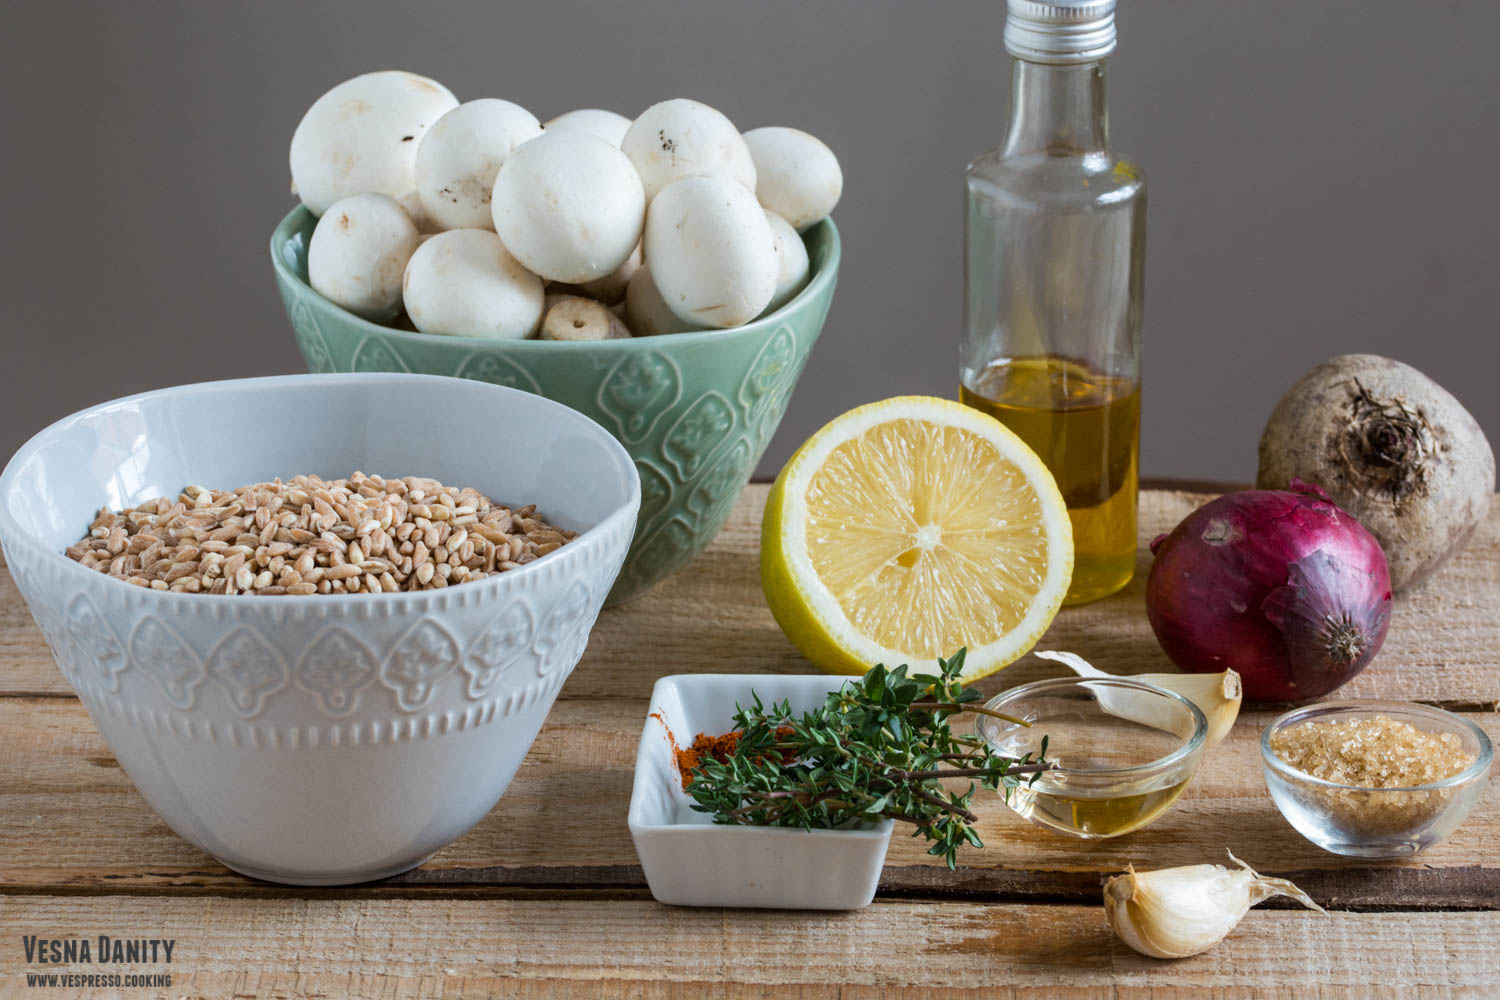
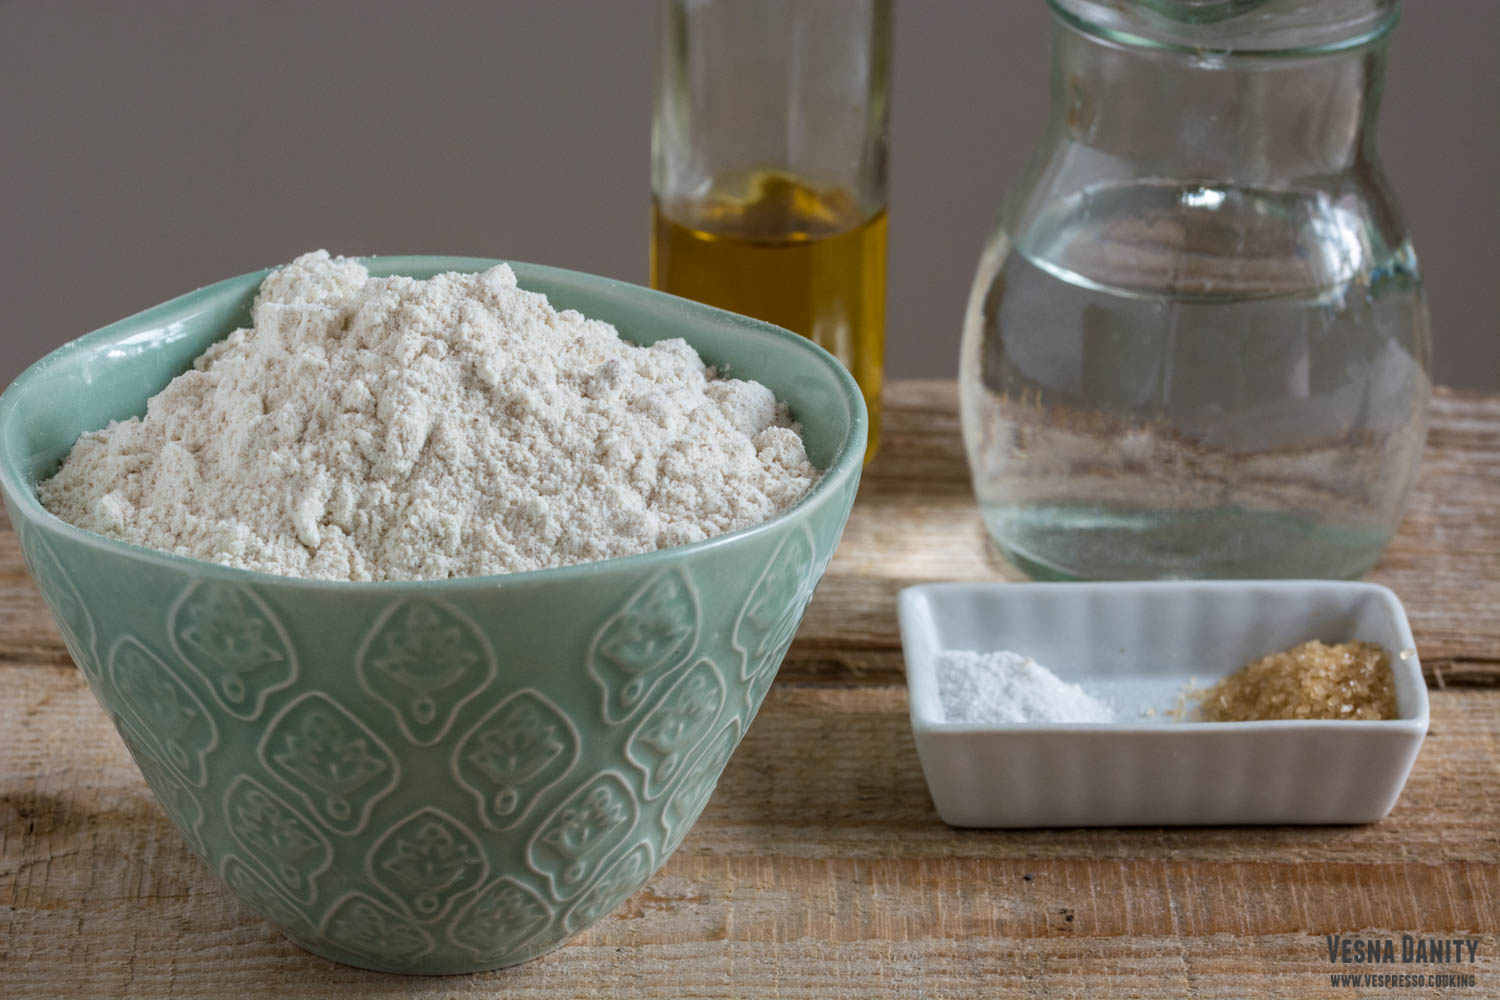
Ingredients (for 6 – 8 flatbreads):

  • 280g whole wheat flour (2 cups) * + extra 70g for rolling (1/2 cups)
  • 75ml olive oil (5 Tbsp)**
  • aprox 140ml lukewarm water (38 – 40°C)***
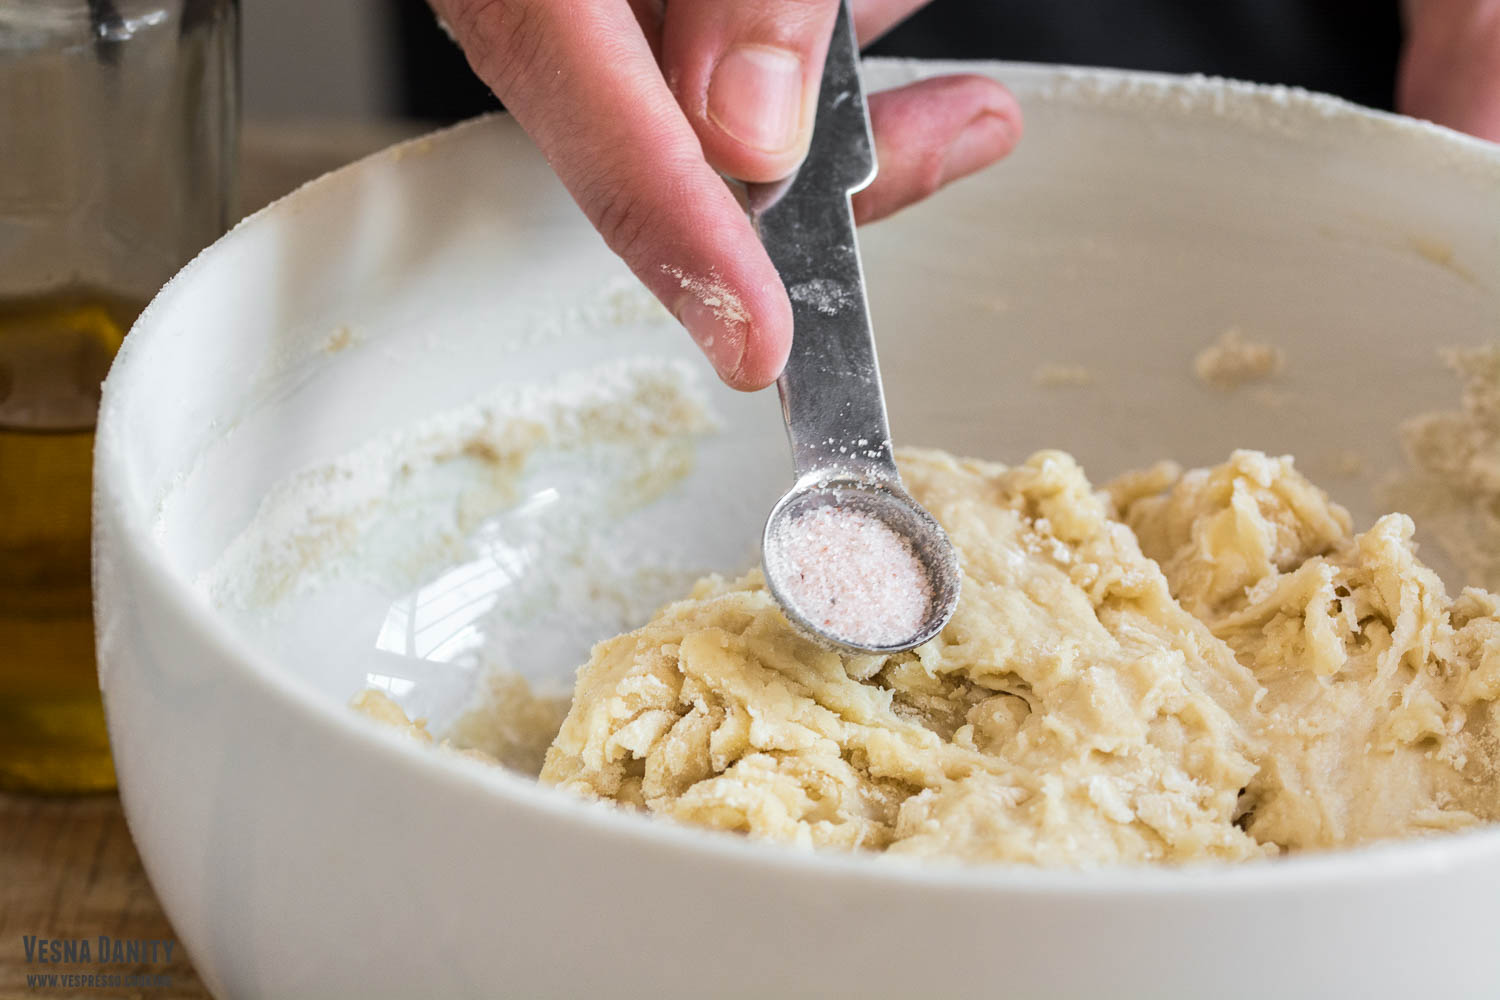
  • 5g salt (1 tsp)
  • 5g  granulated sugar (1 tsp)

* I used whole wheat flour. This recipe can be made with all-purpose white flour or with a mixture of all-purpose and whole wheat flour.

** One Tbsp of olive oil is added to the dough and 4 Tbsp are used for brushing the rolled flatbread.

*** The quantity of water depends on the type of flour. The water is added 2 Tbsp at a time until you form a soft ball of dough, a ball that doesn’t stick to the bowl. For 280g whole wheat flour I use about 140ml water.

Method:

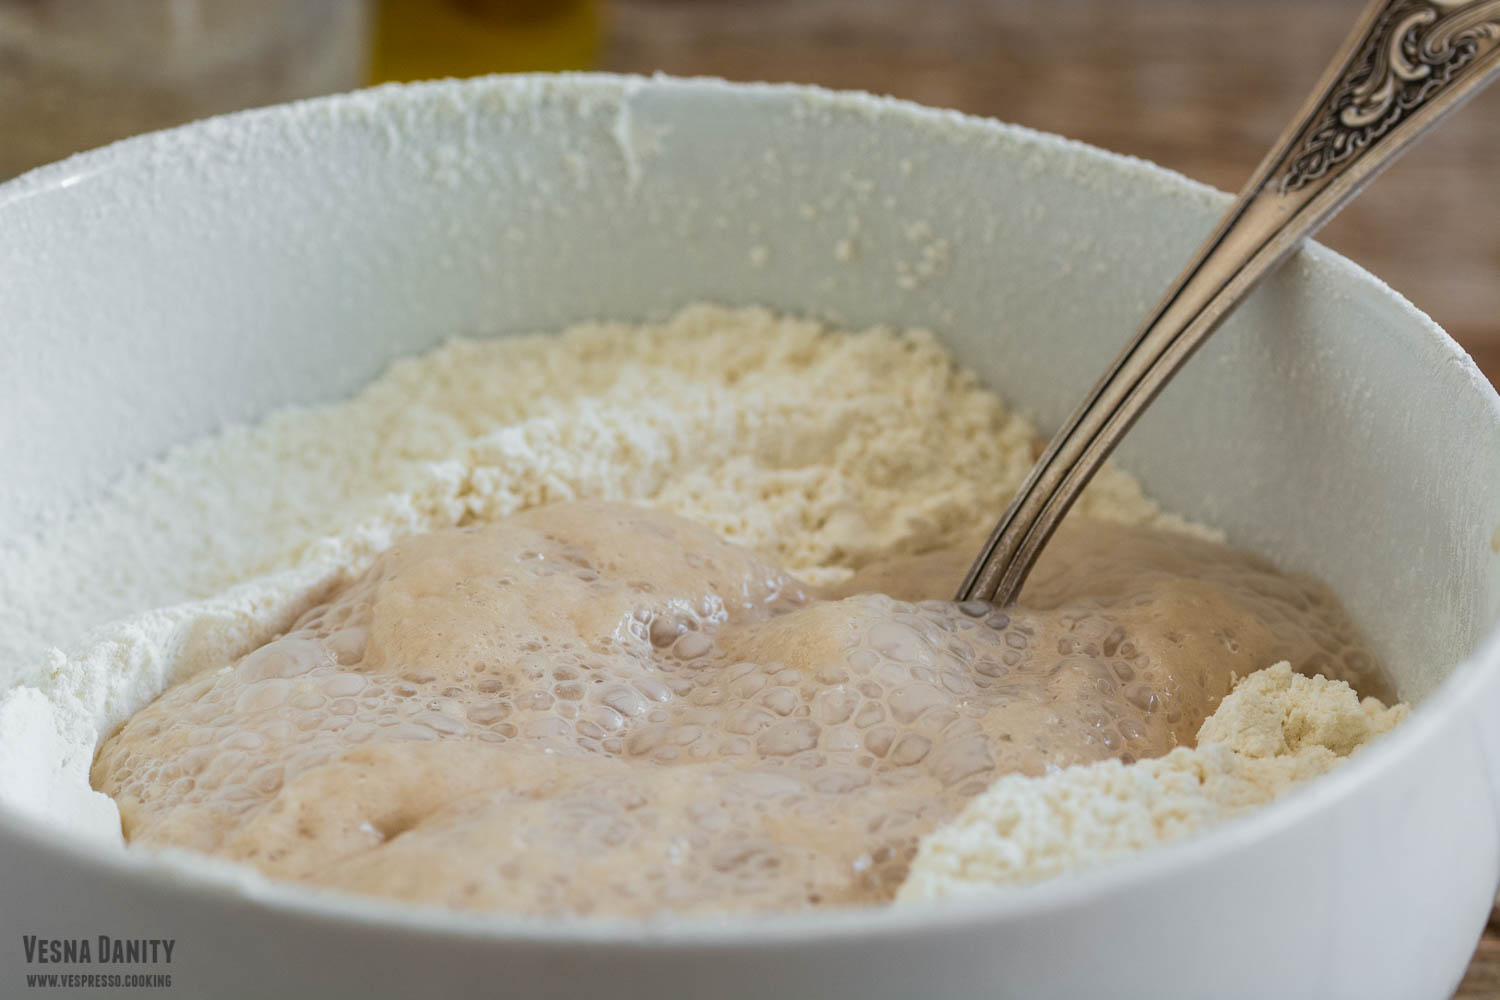
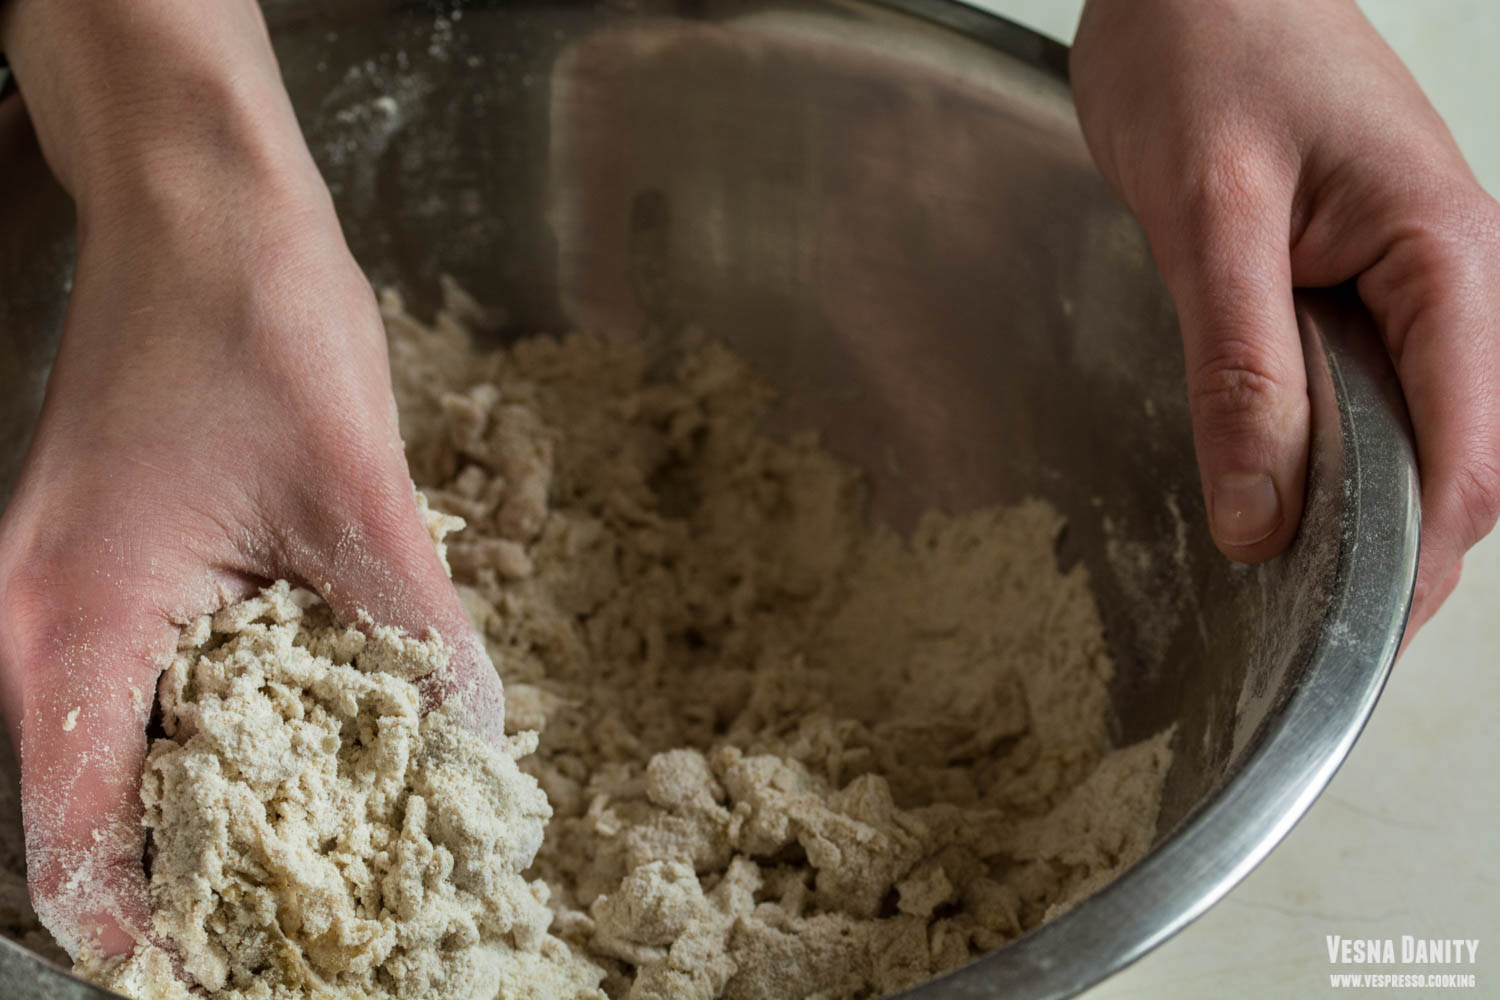
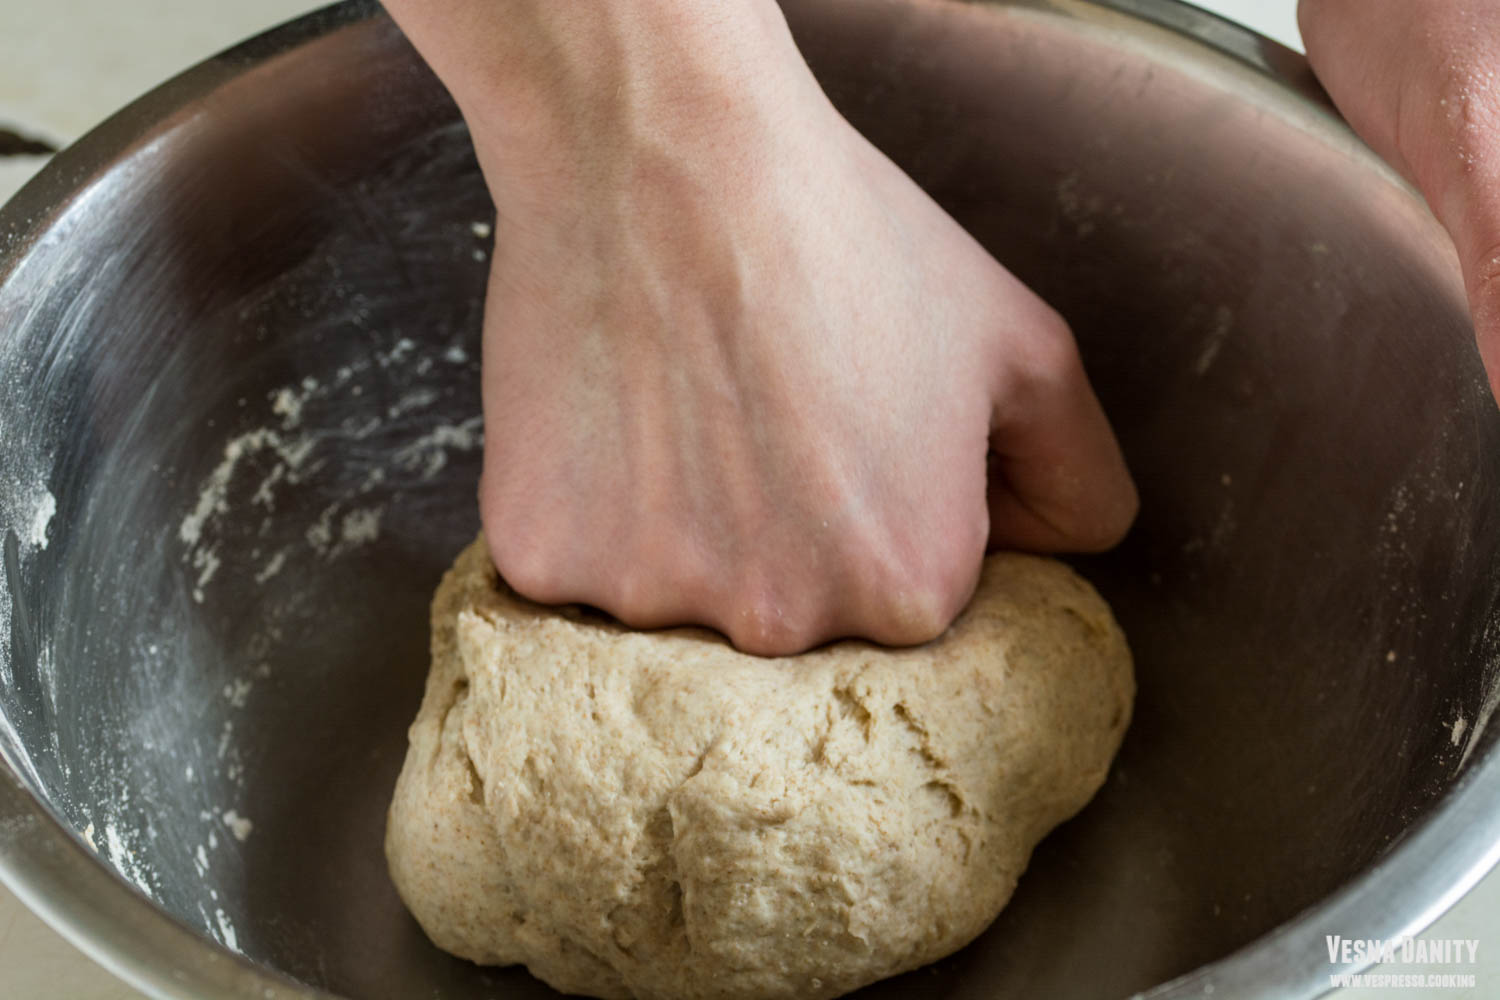
  1. Prepare the dough. In a large bowl combine white flour (sifted), sugar, salt and oil and make a well in the center. Add about 2 Tbsp of water at a time and mix with your fingers until you form a ball. The ball should be soft but it shouldn’t stick to the bowl.
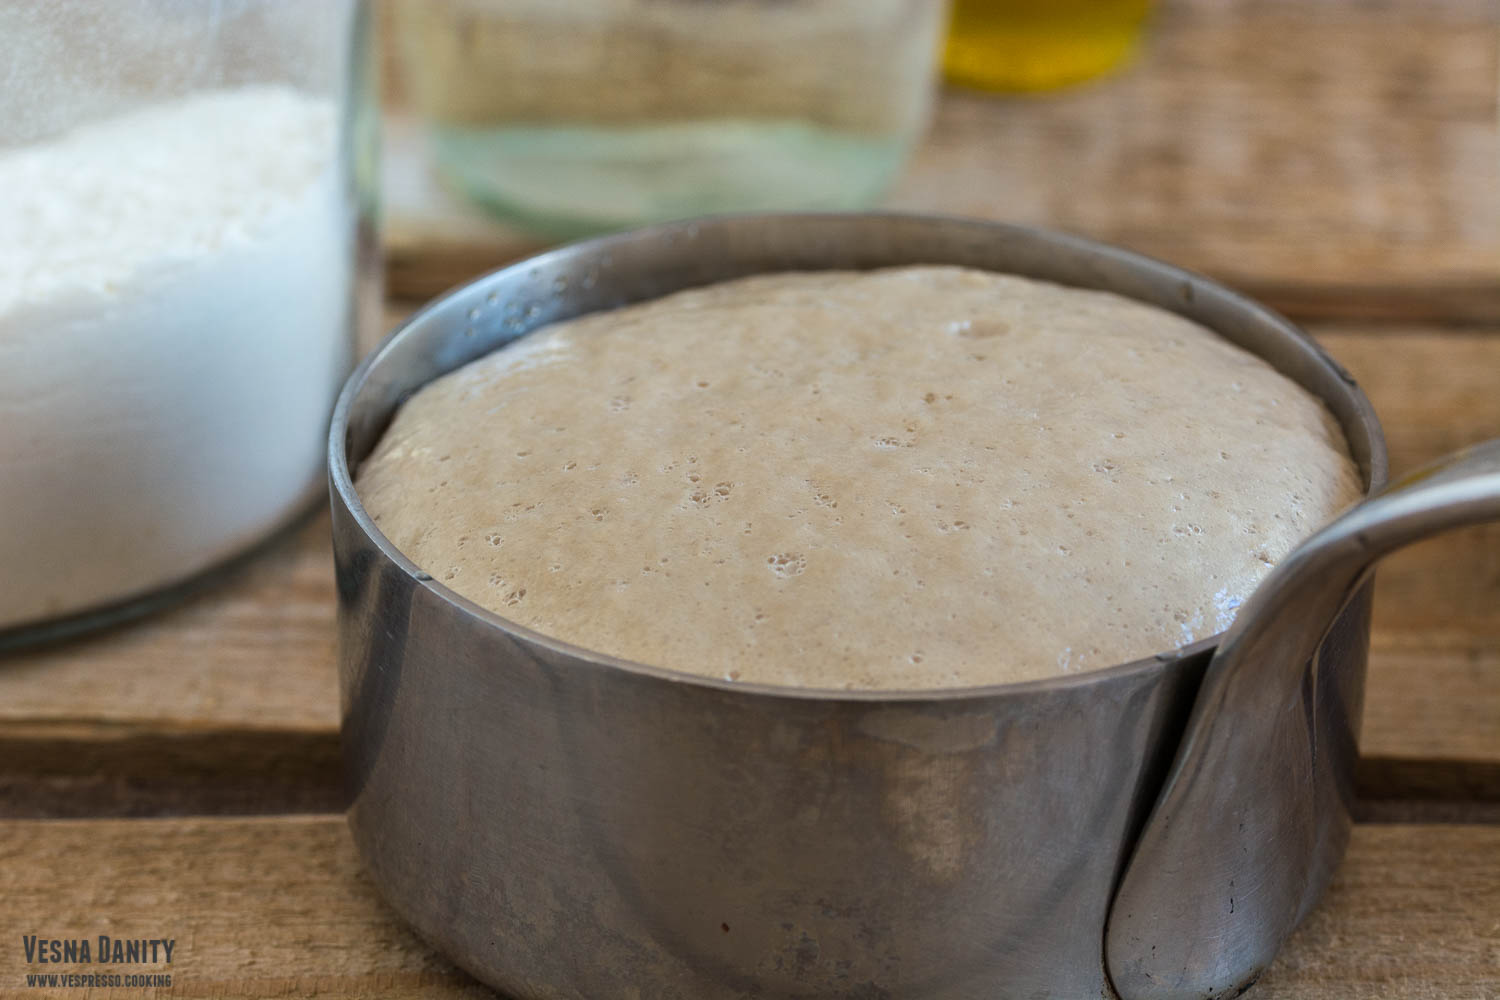
  2. Knead the dough. Bring the dough to a floured working surface and knead it for 2 minutes. Place the dough in the bowl, cover it with a damp towel and let it rest for 30 minutes.
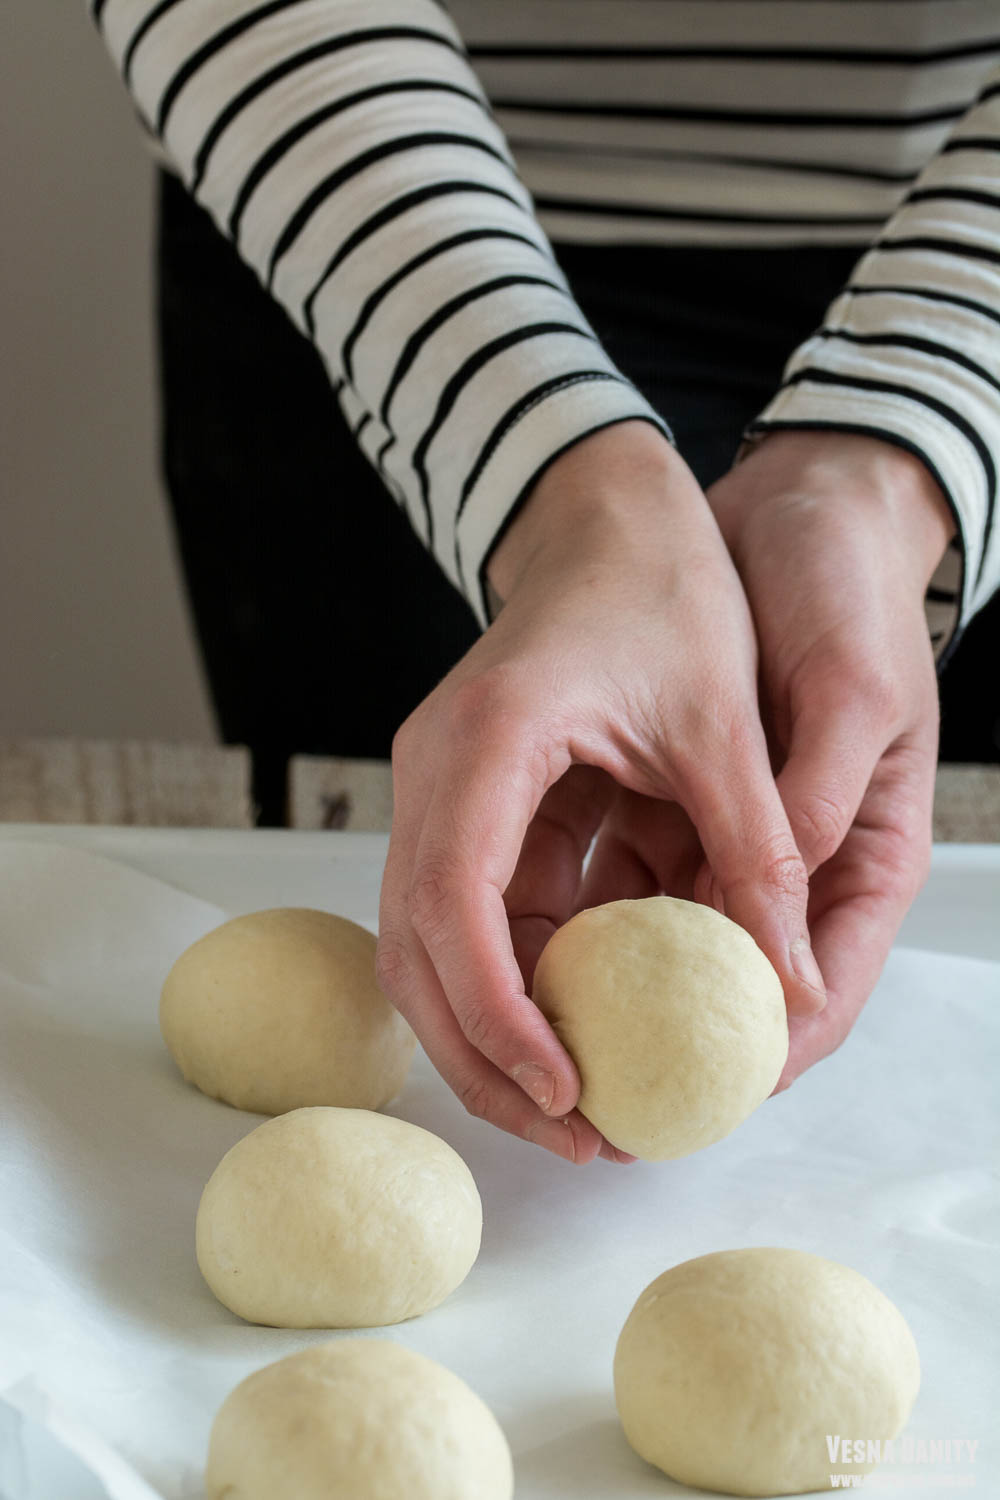
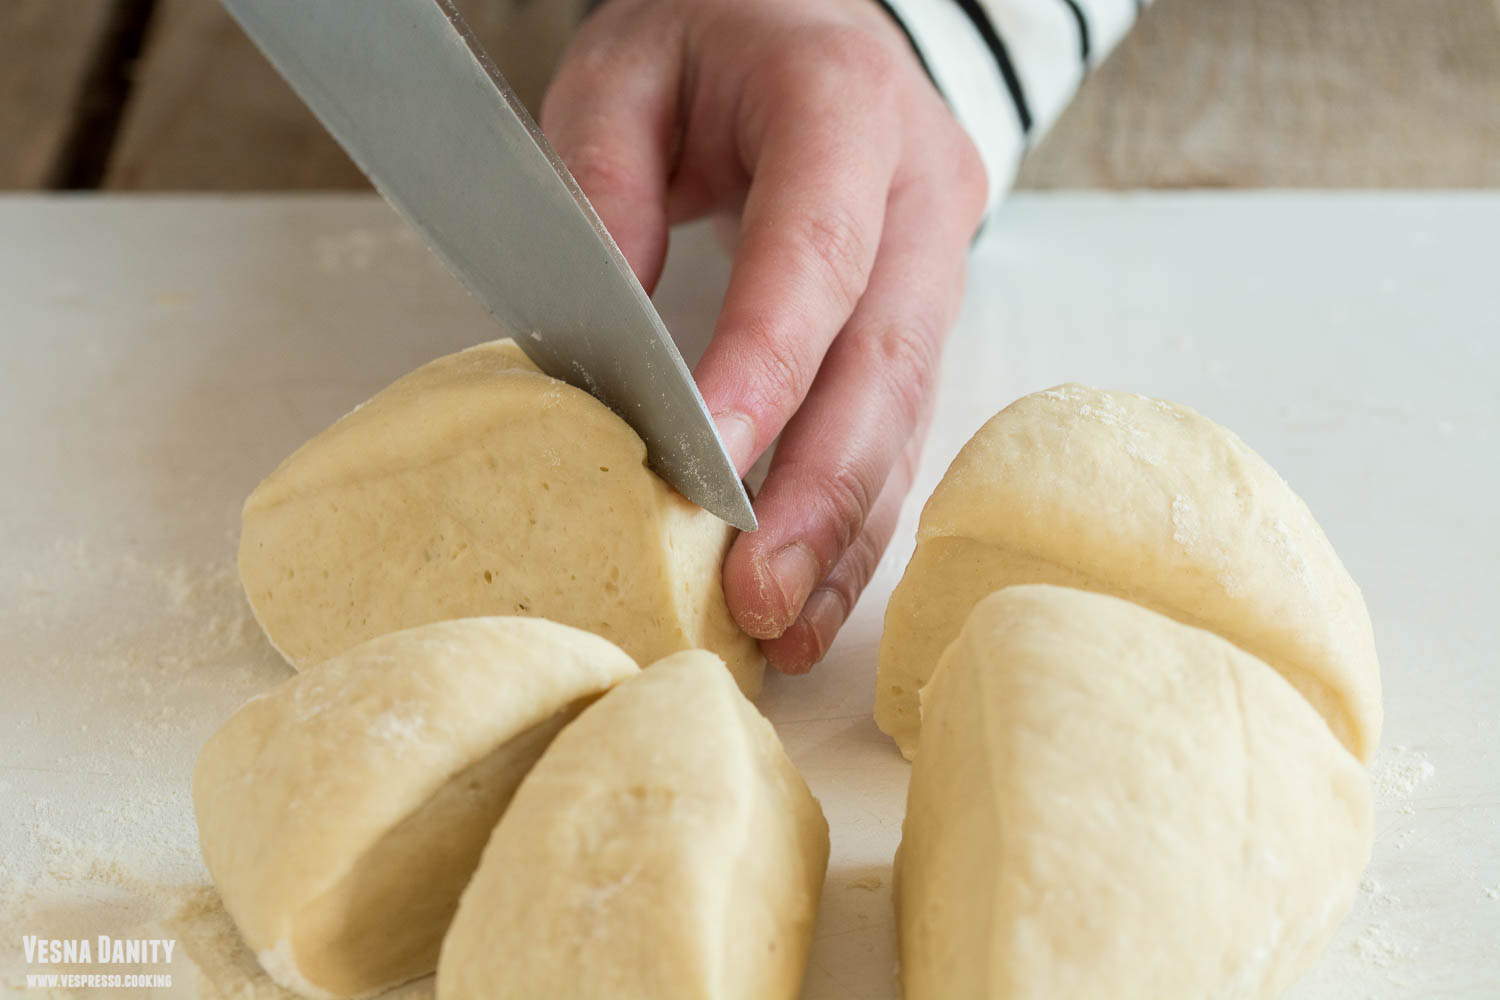
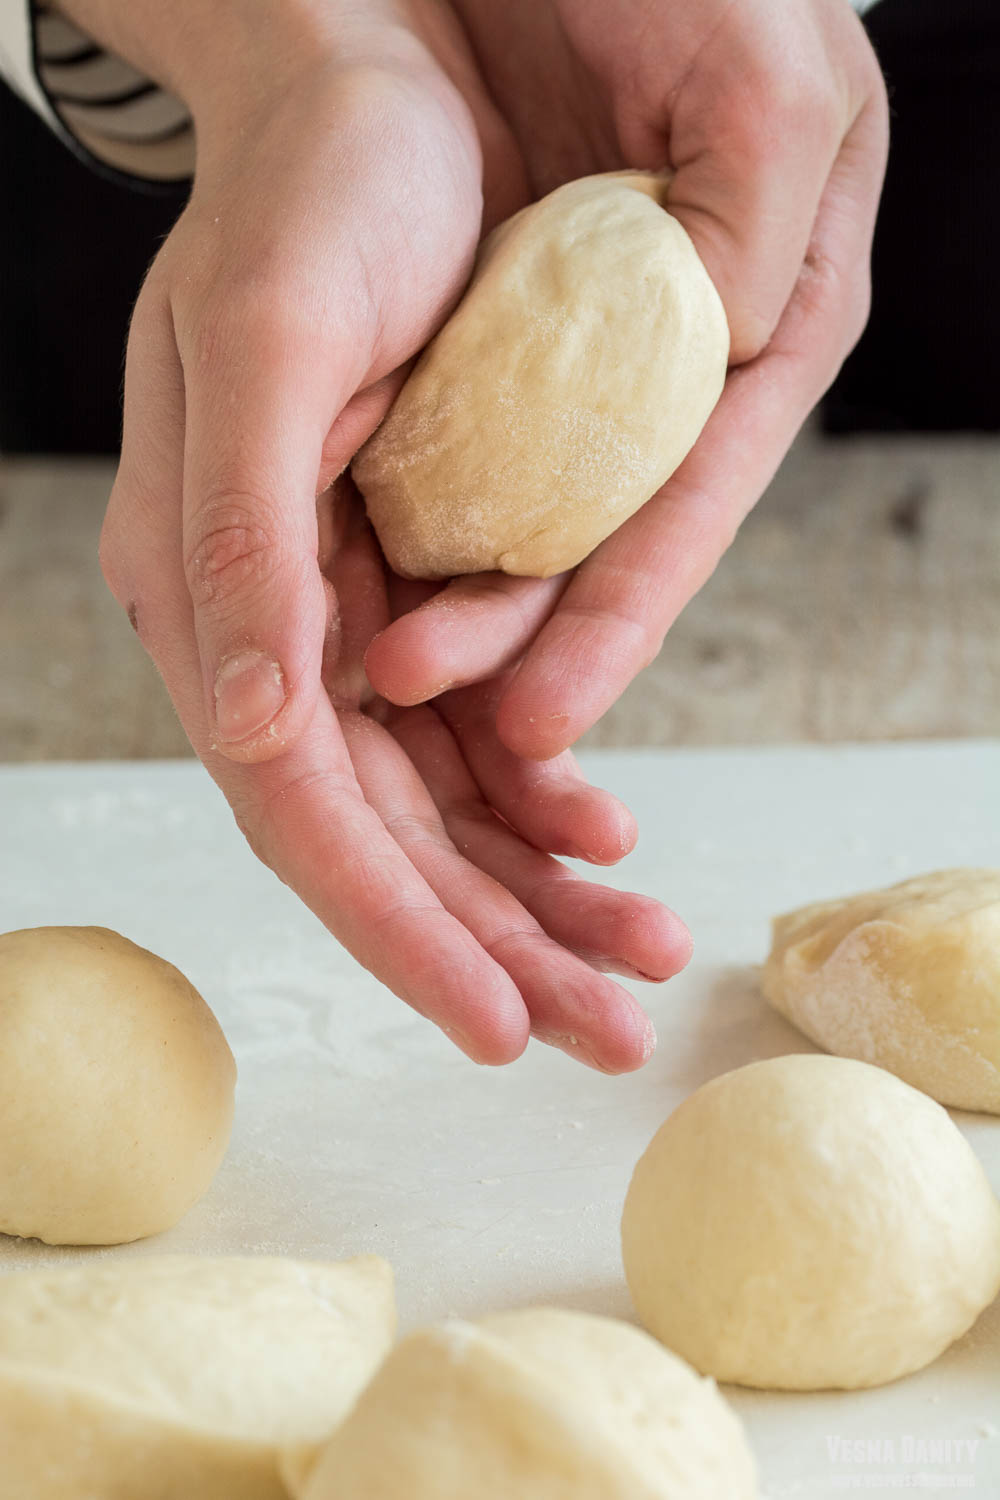
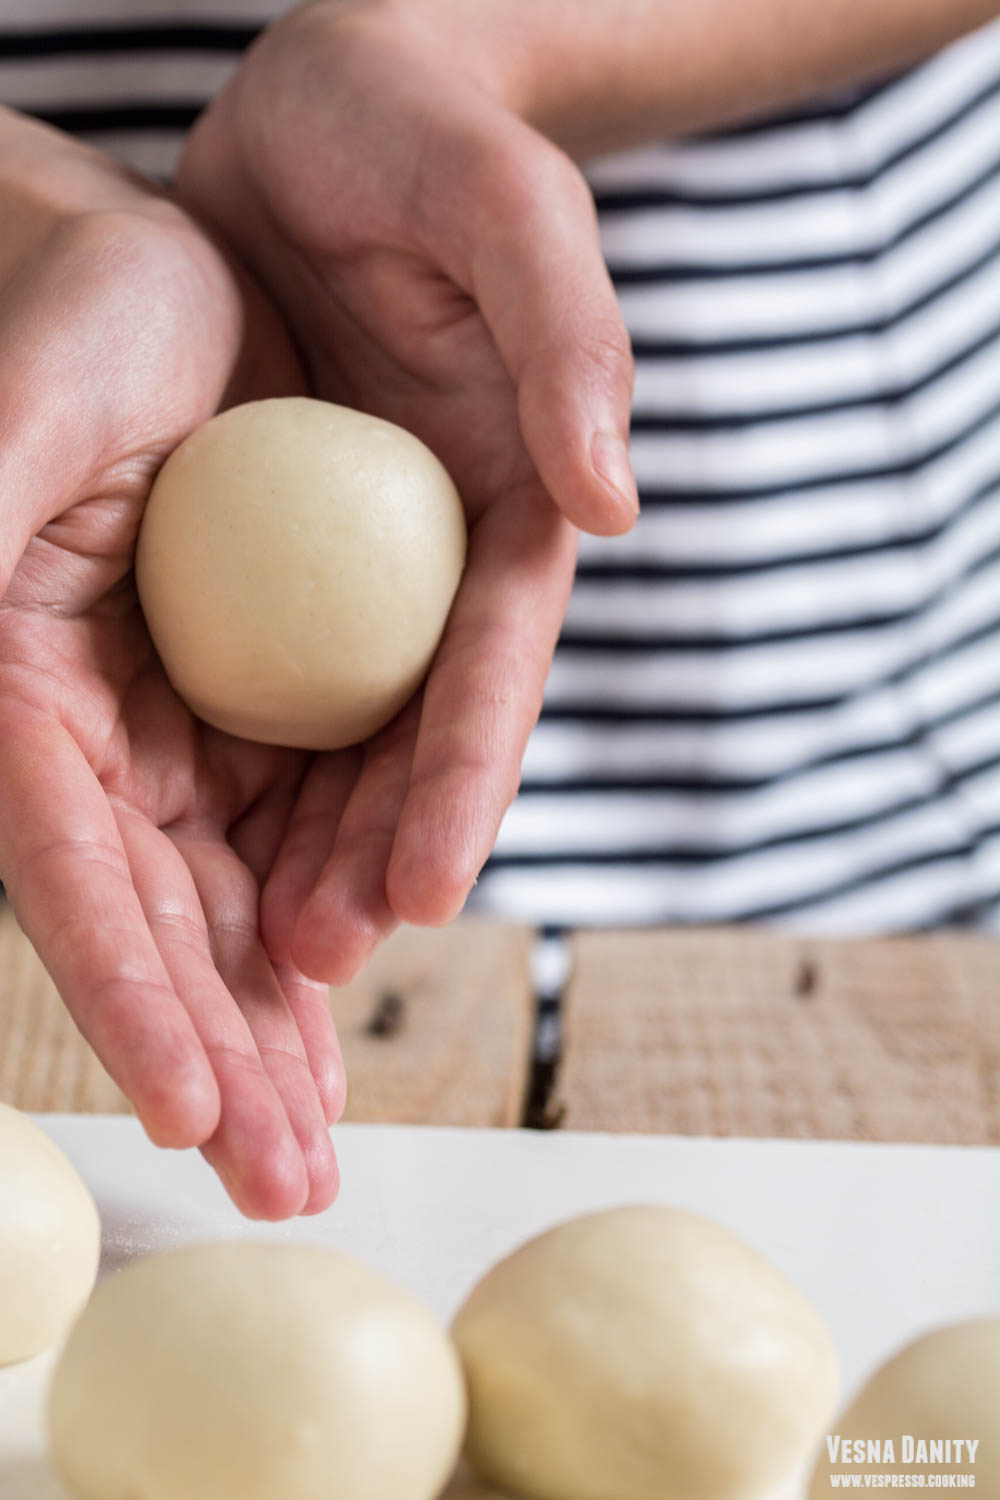
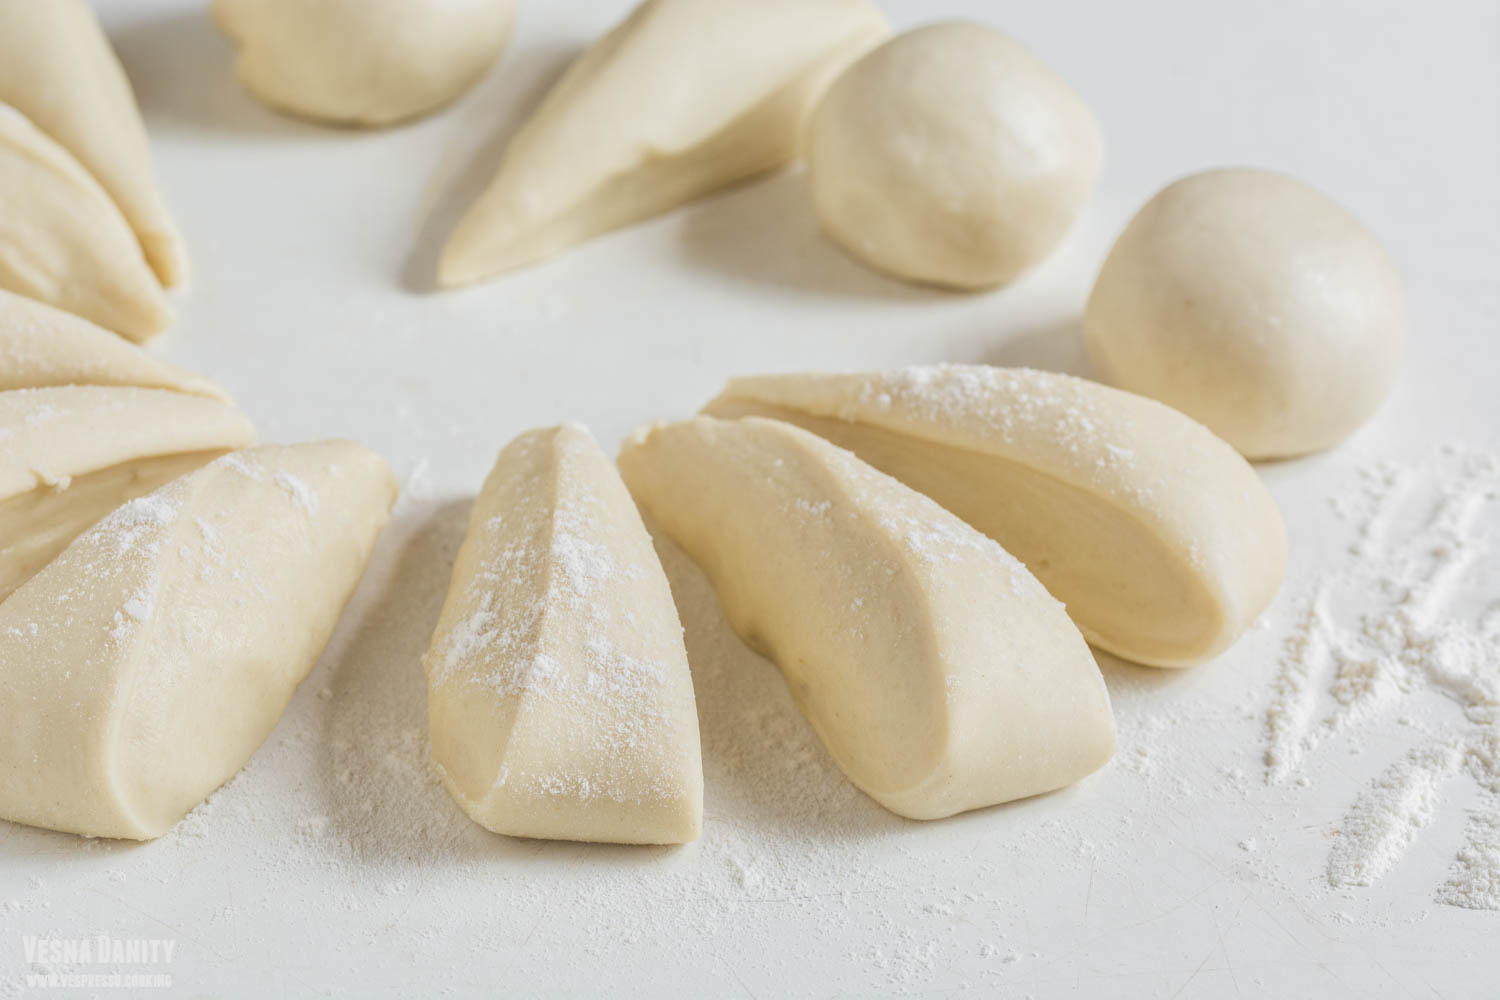
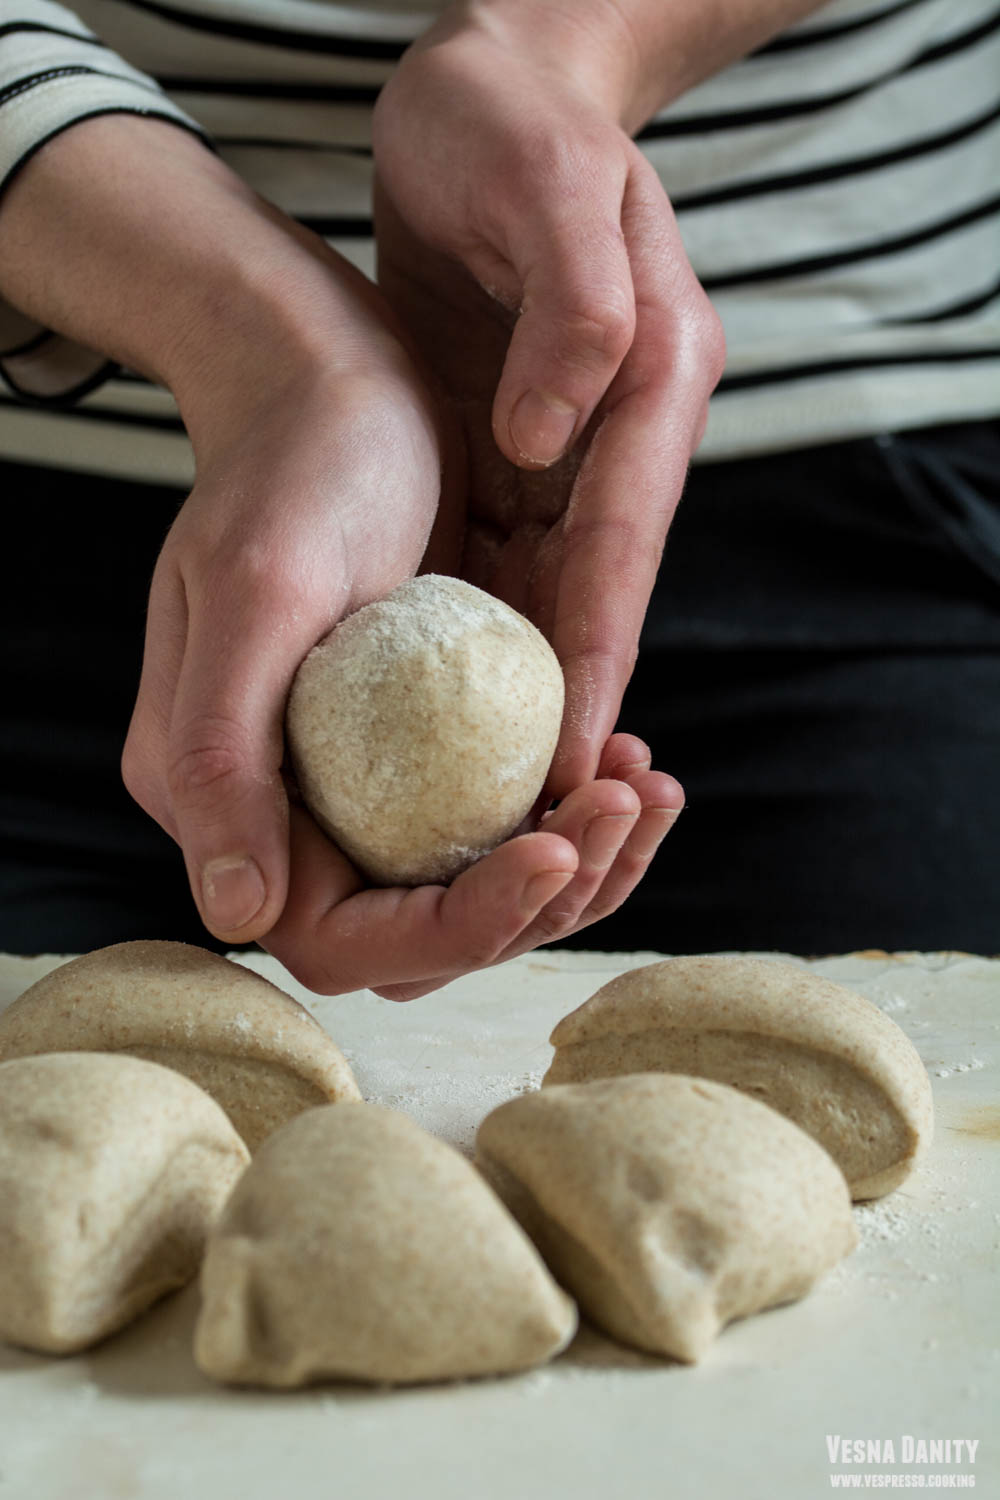
  3. Cut the dough into triangles. After 30 minutes, place the dough back on the working surface, knead it and cut it into 6 triangles. Shape each triangle into a small ball.
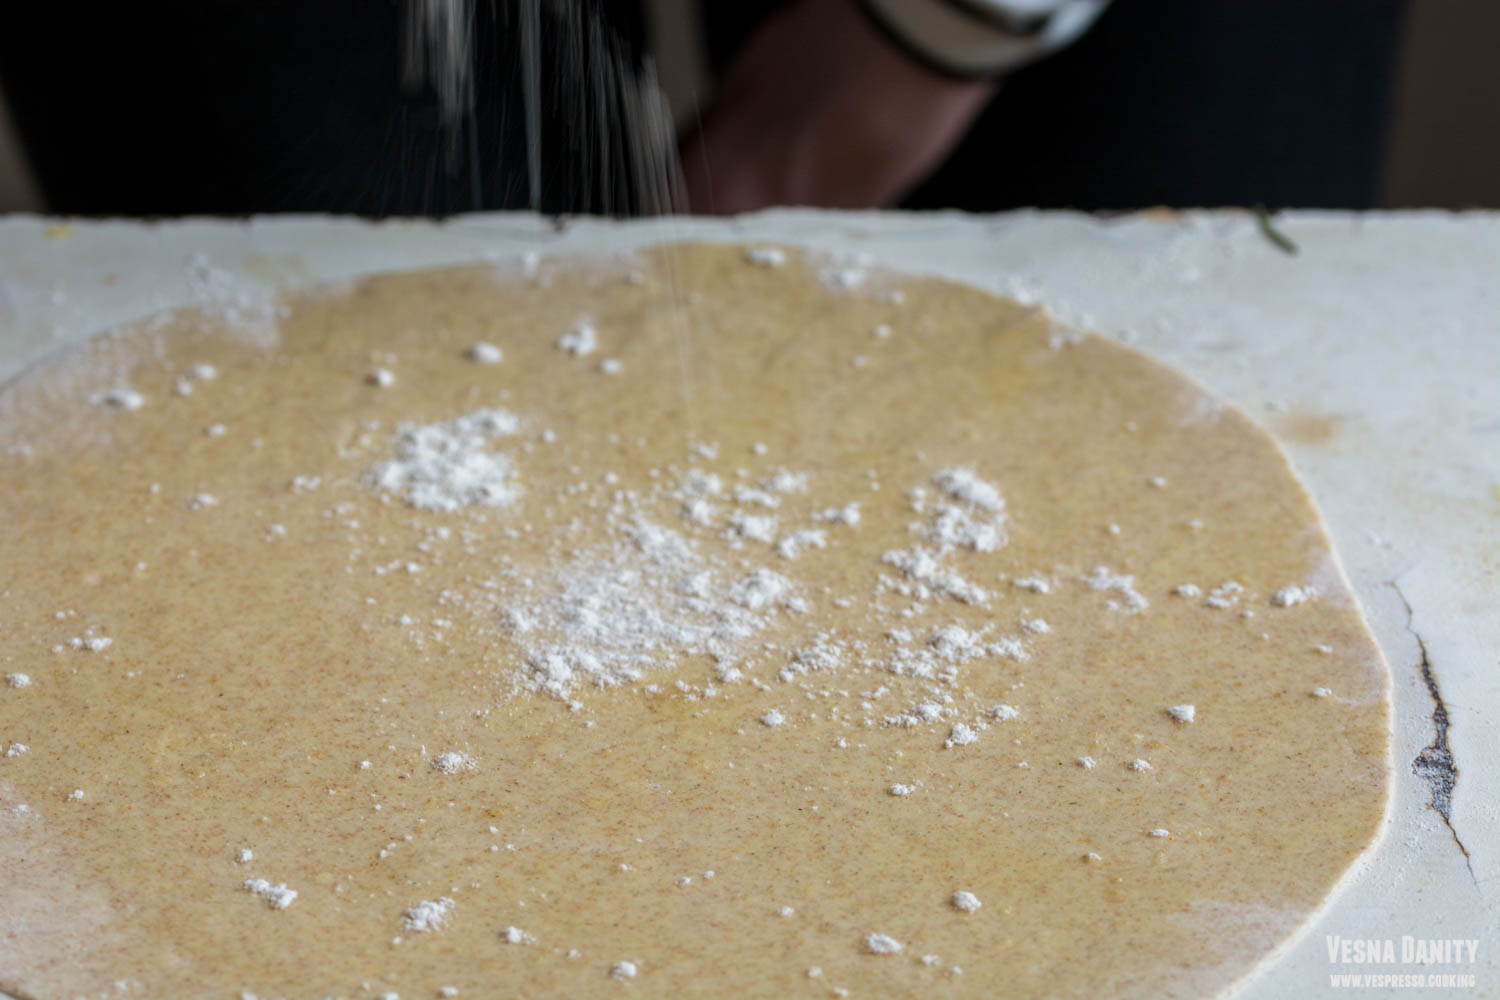
  4. Roll the first piece of dough. Place one ball on the floured working surface and cover the other 5 with the same damp towel. Roll the first ball with a rolling pin until it gets 2mm thick.
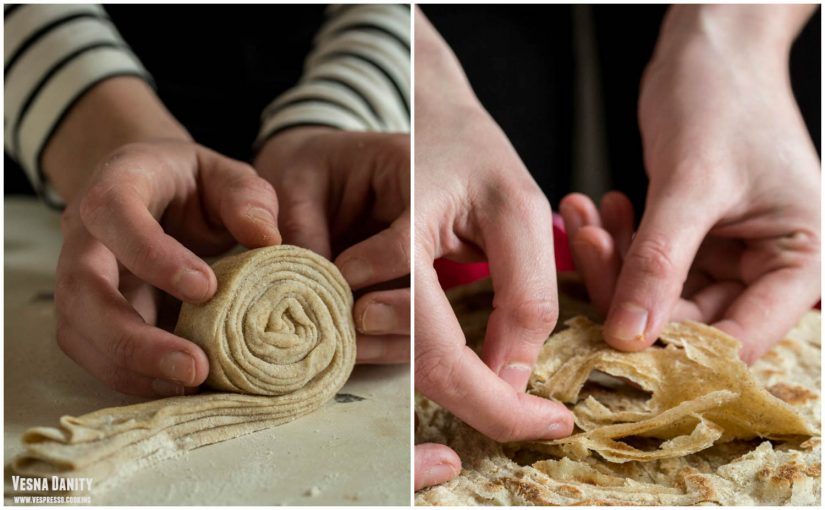
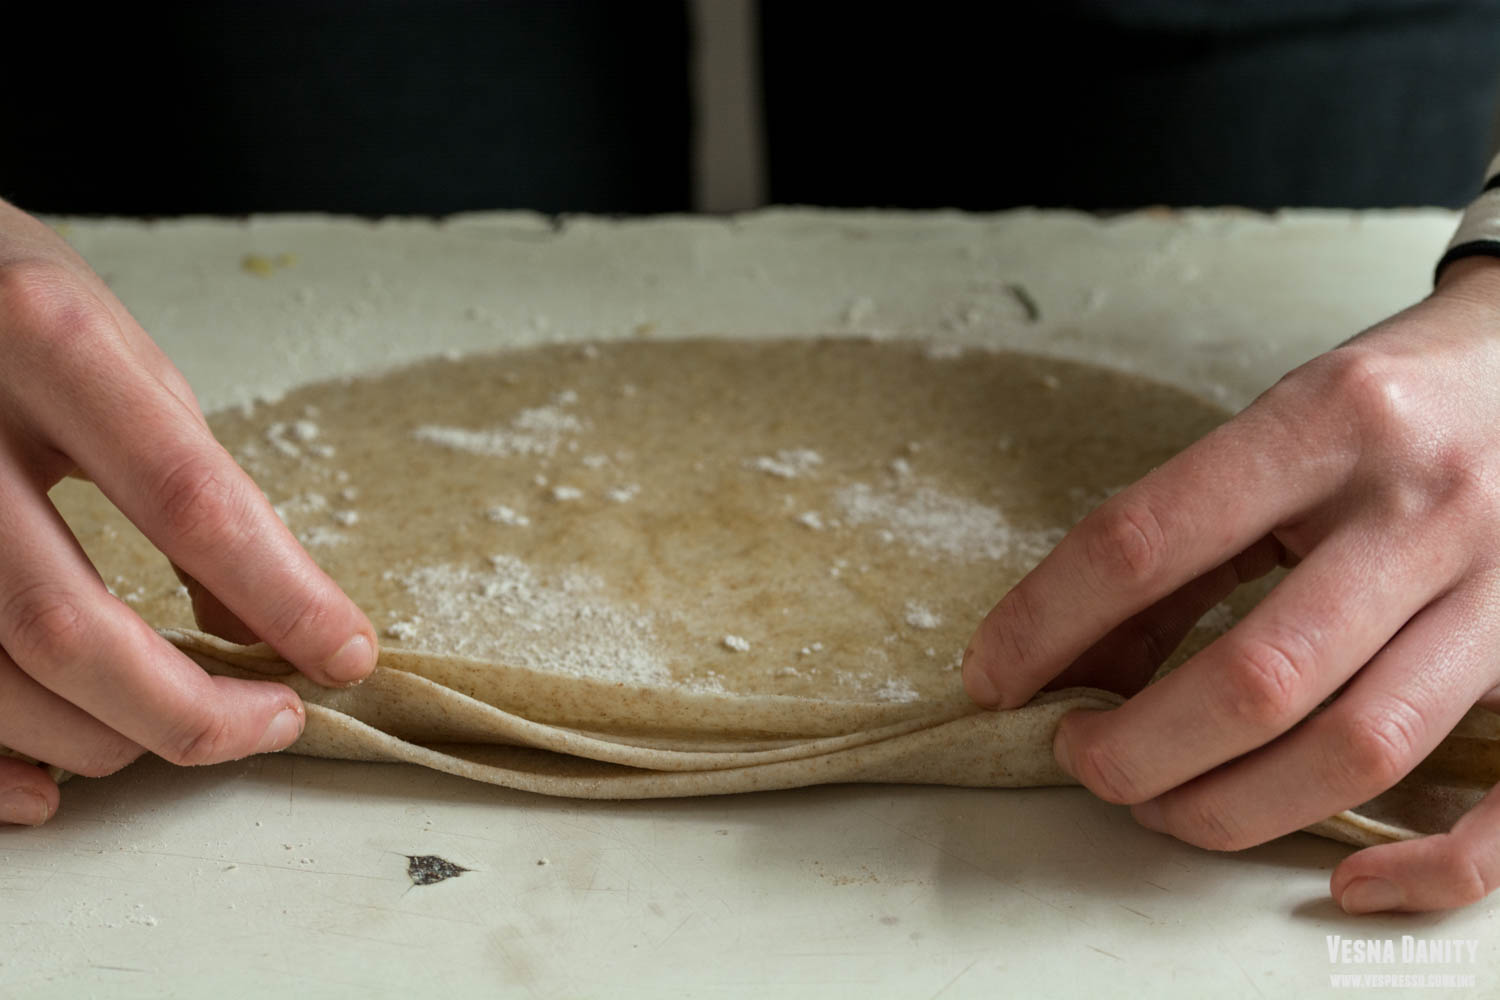
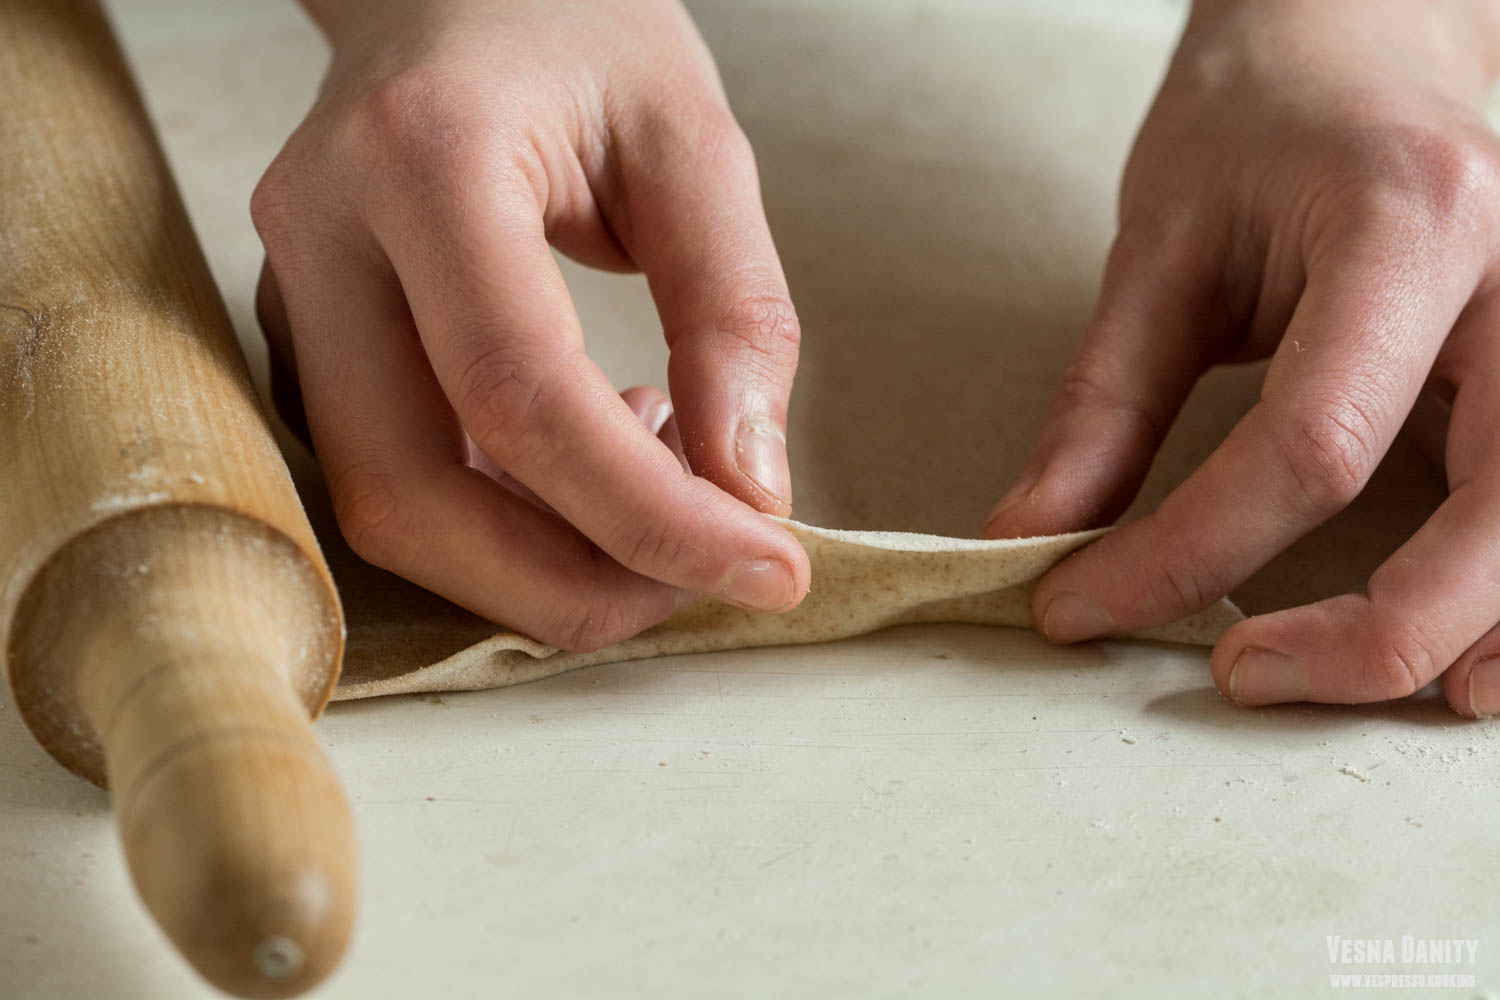
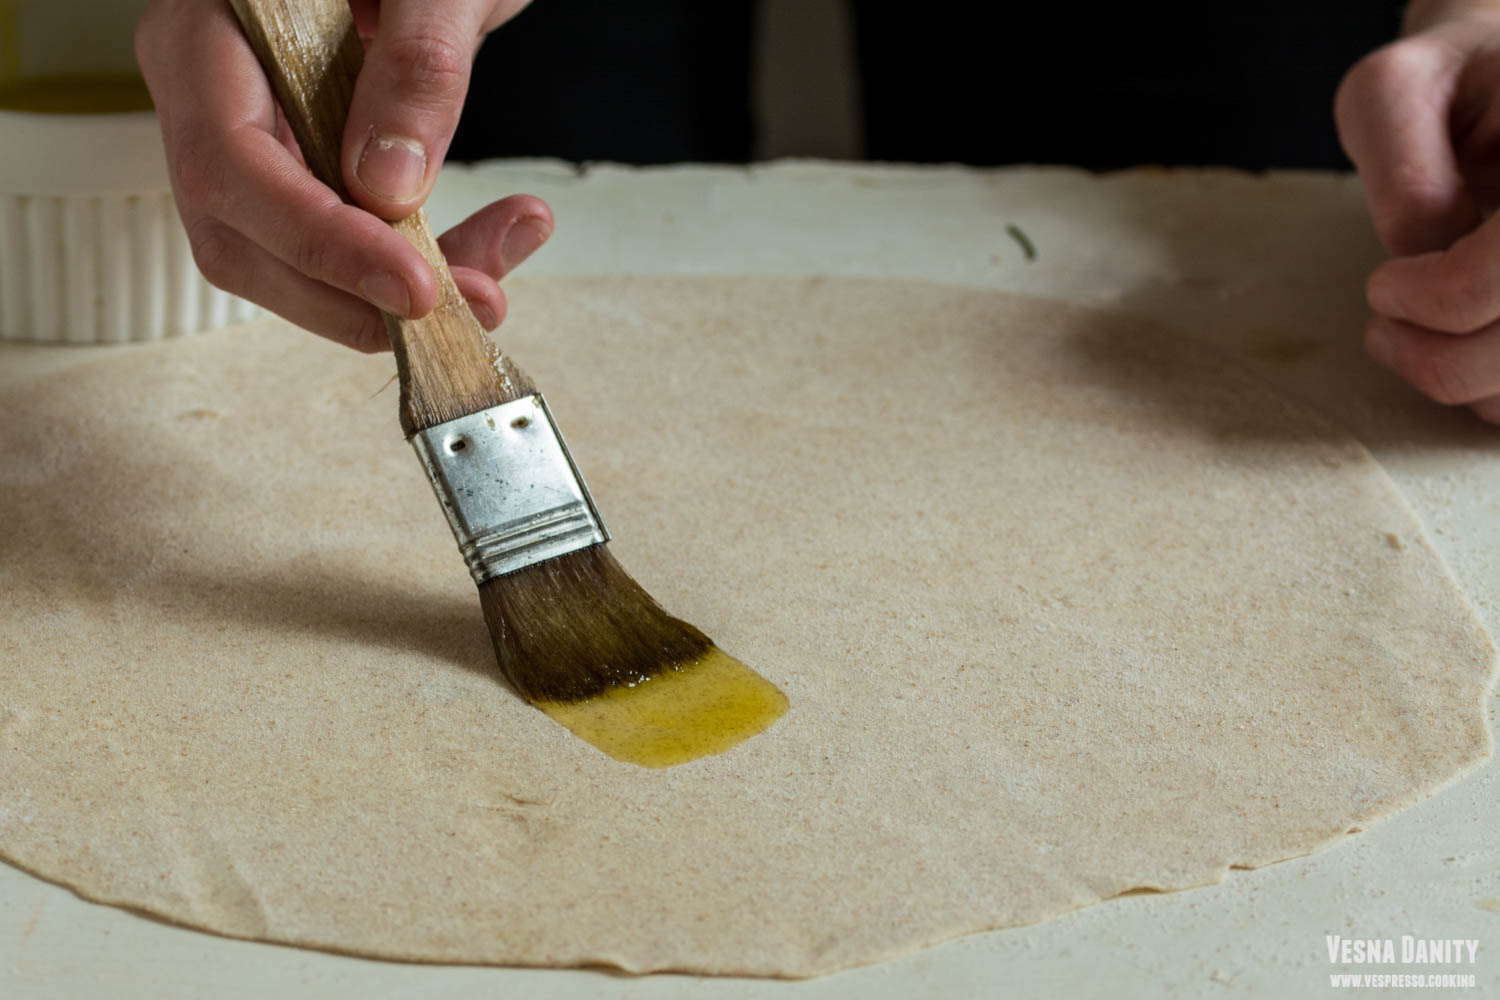
  5. Olive oil & flour.  Brush the first flatbread with olive oil and sprinkle with flour. Beginning with one end, fold it to form pleats.
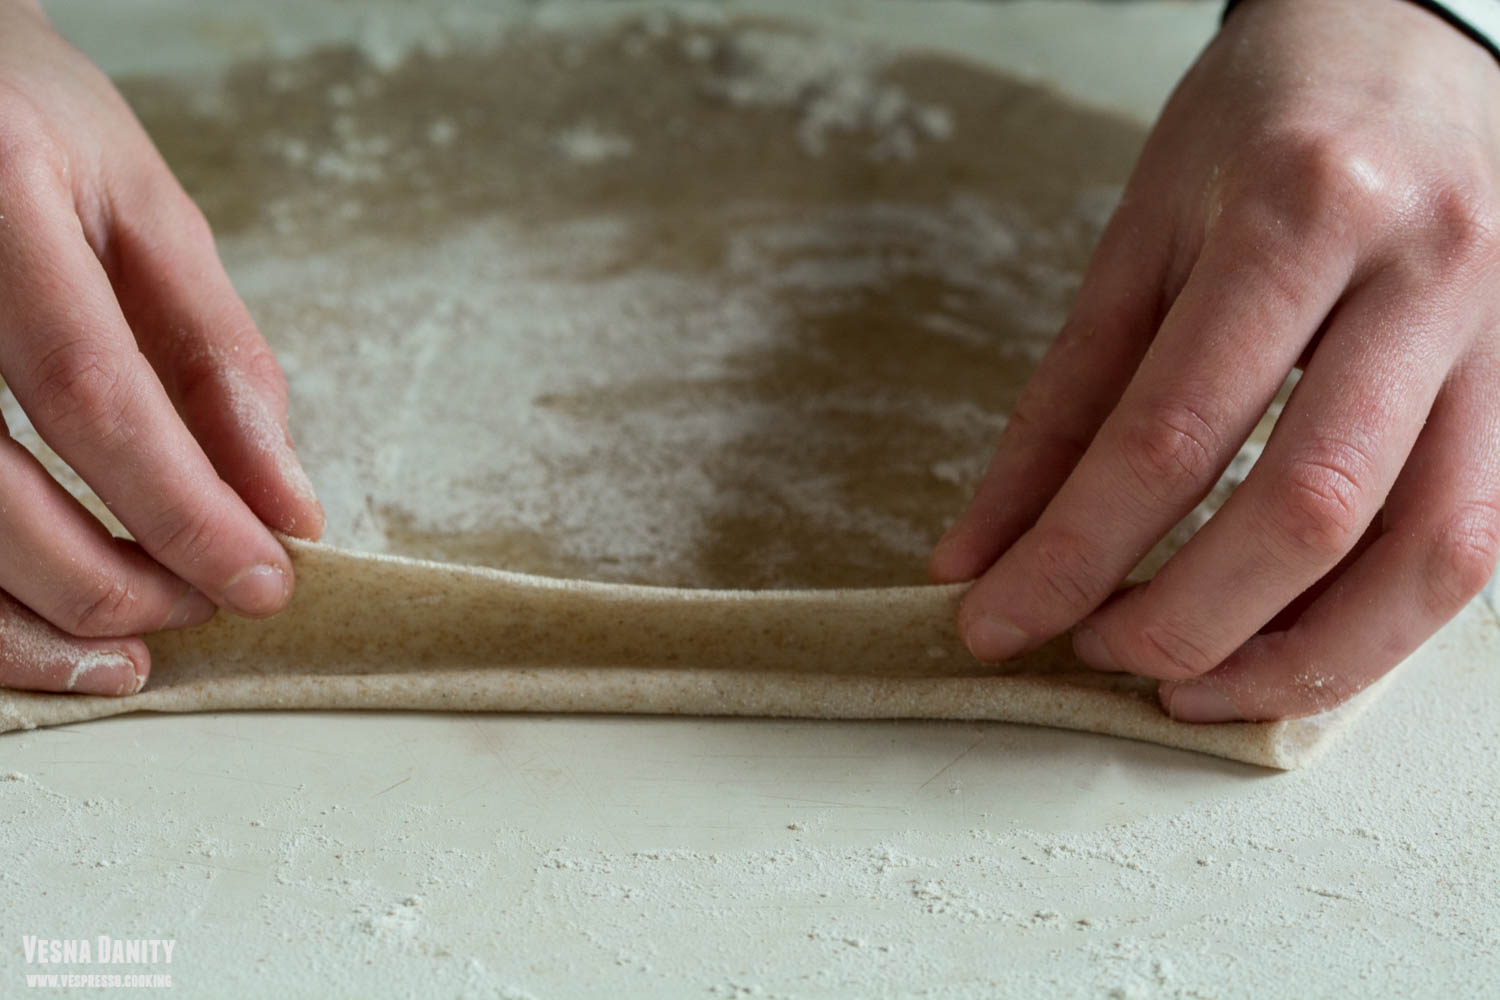
  6. Make a pinwheel. Take one end of the fan and roll it like a pinwheel.
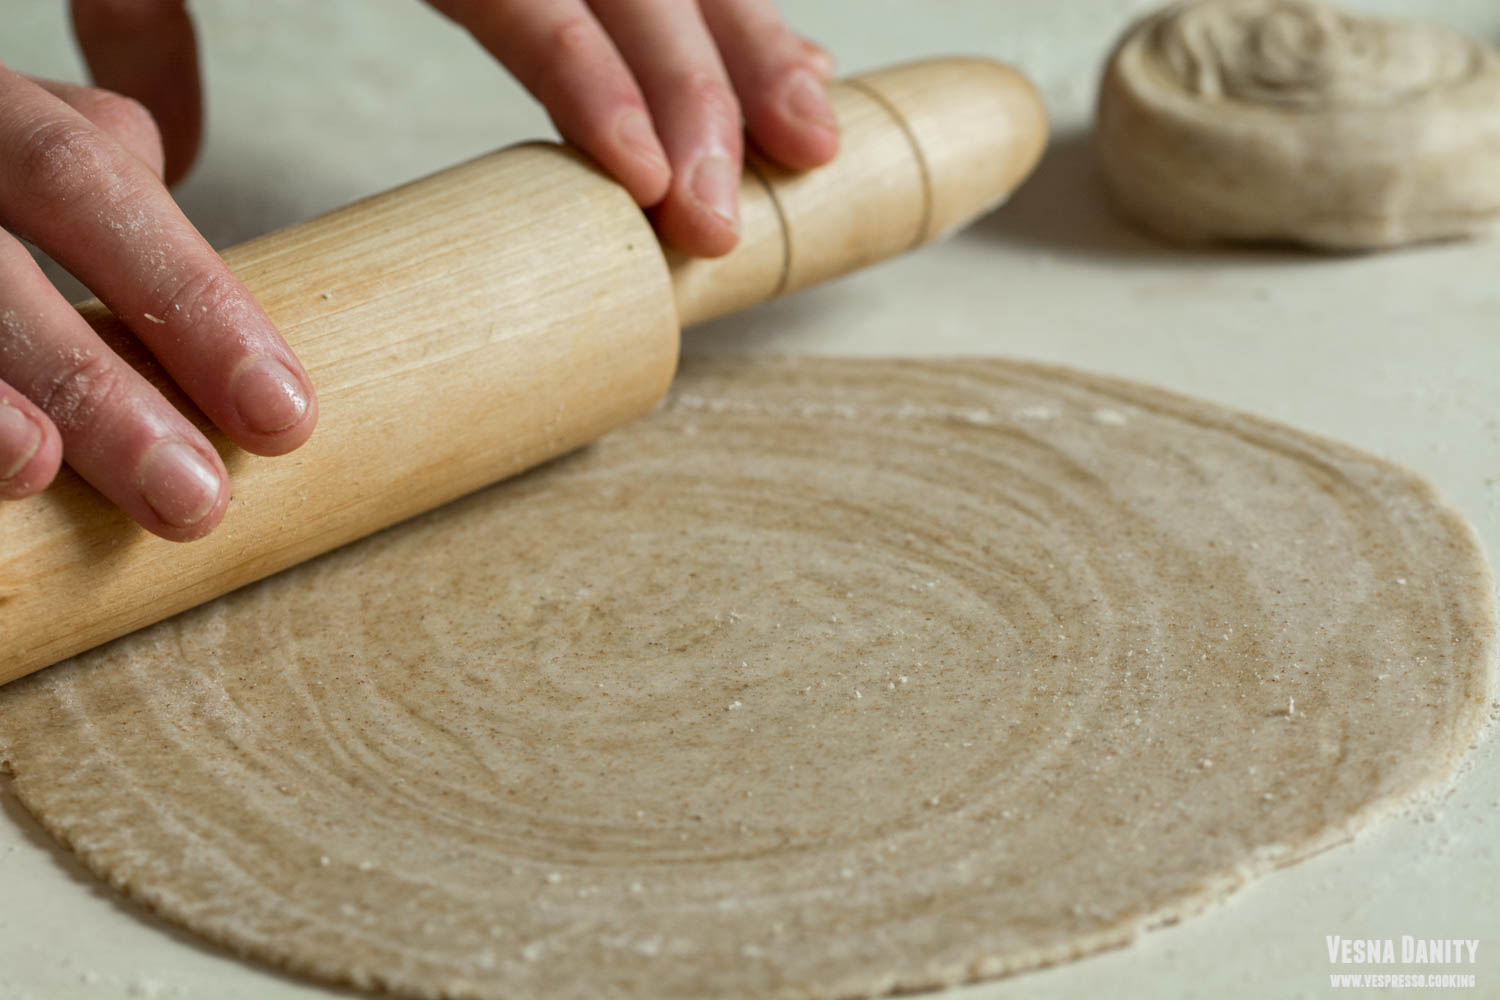
  7. Roll the flatbread. Flatten the pinwheel with a rolling pin until 3 – 4mm thick.
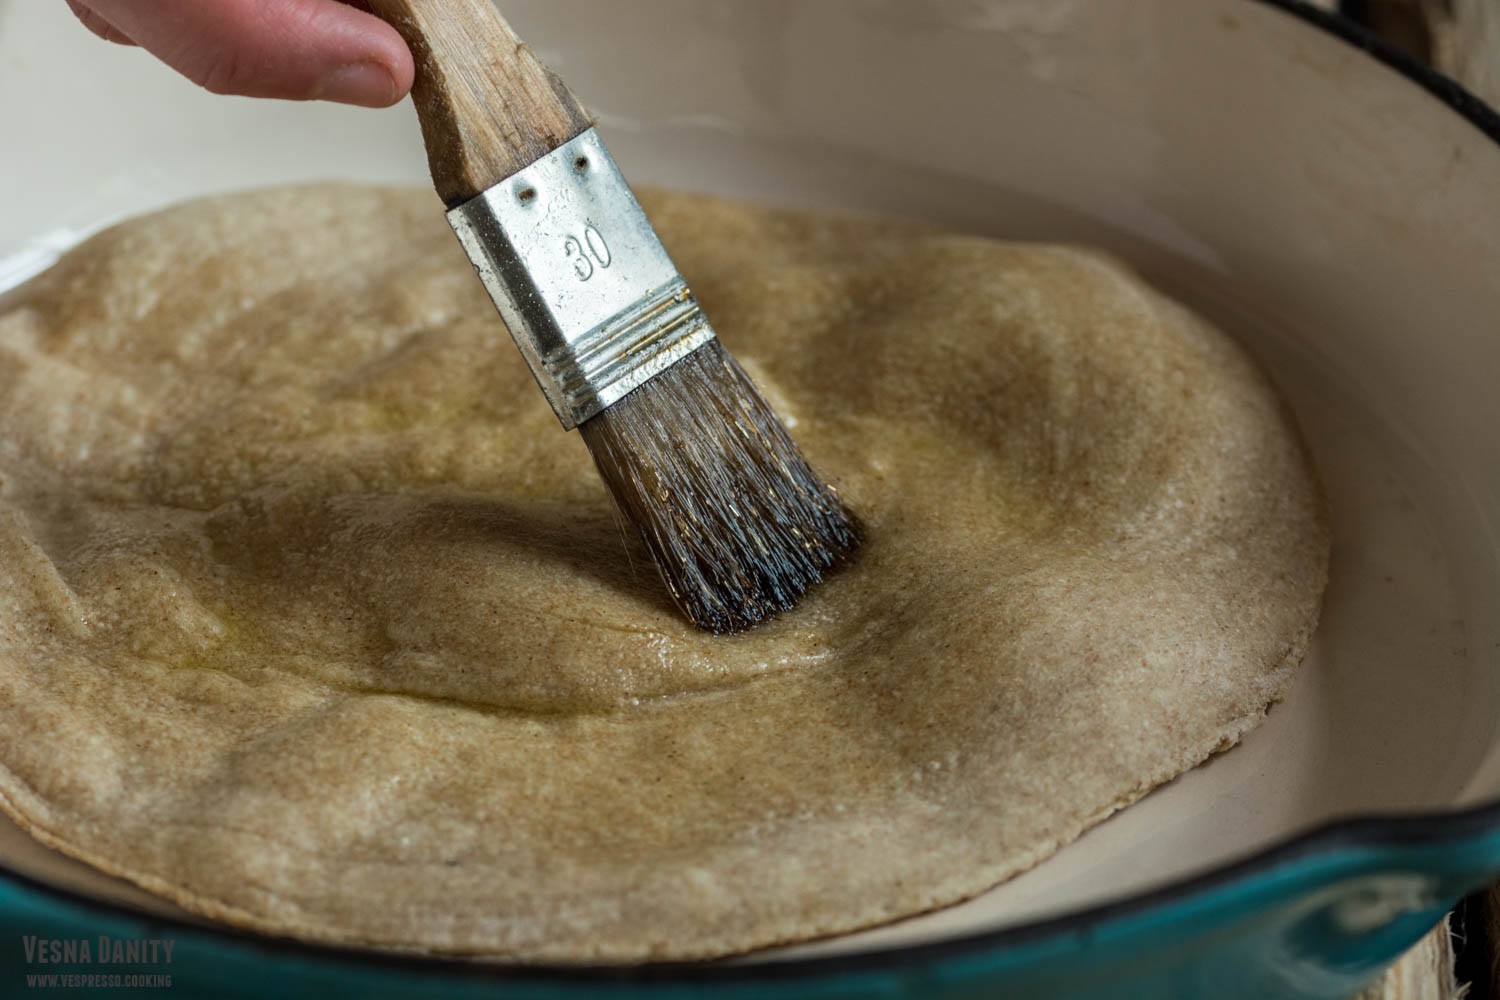
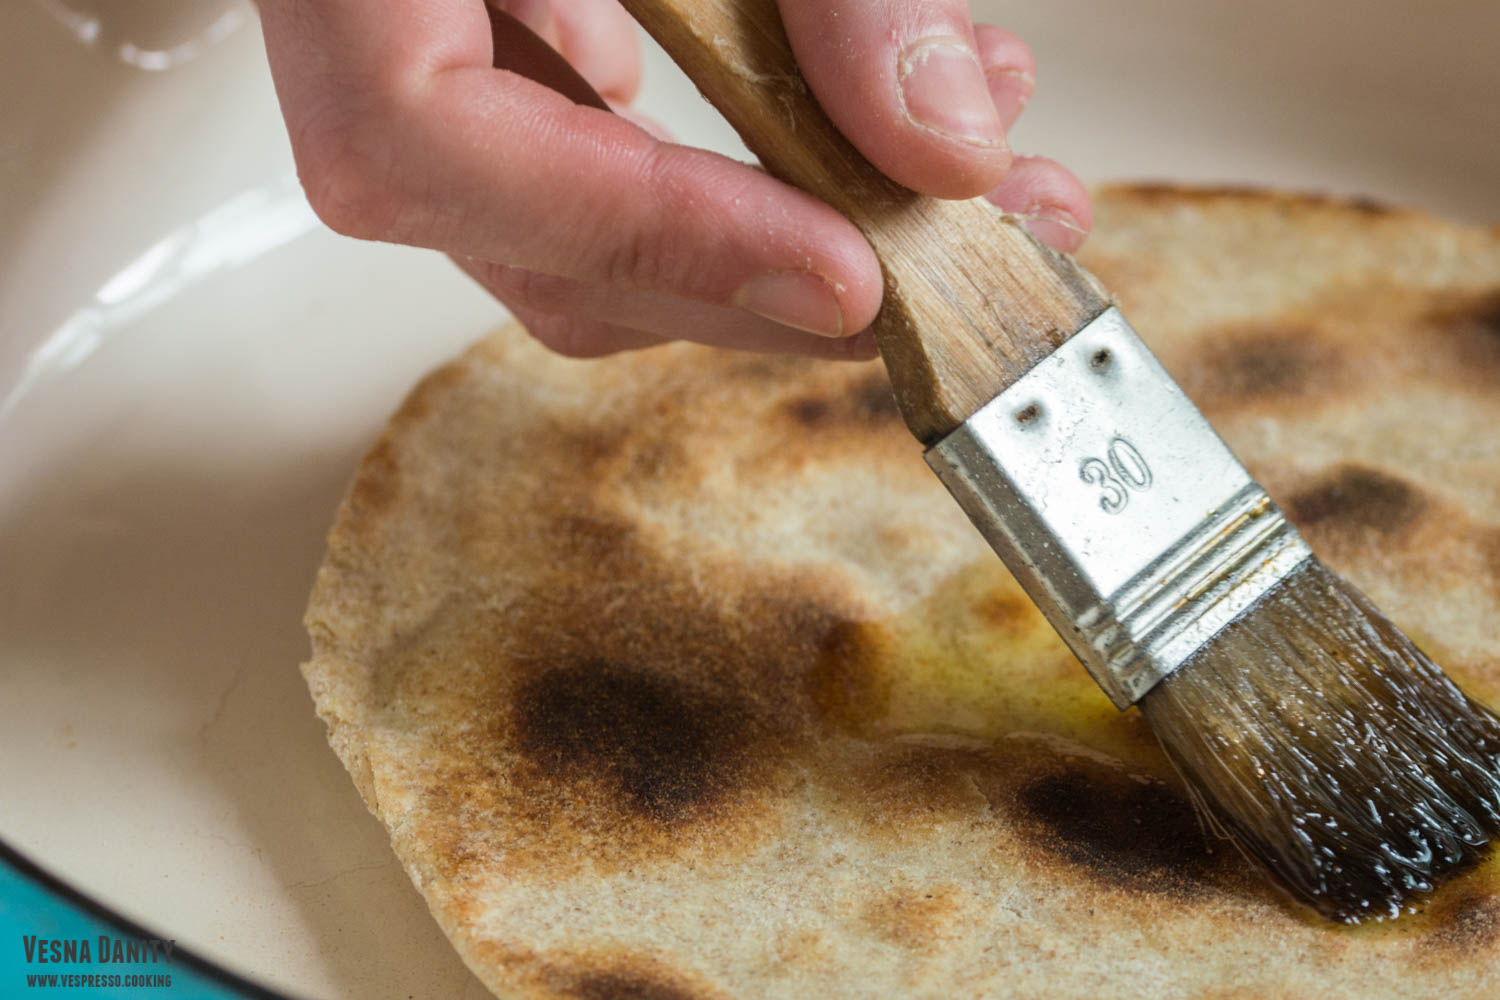
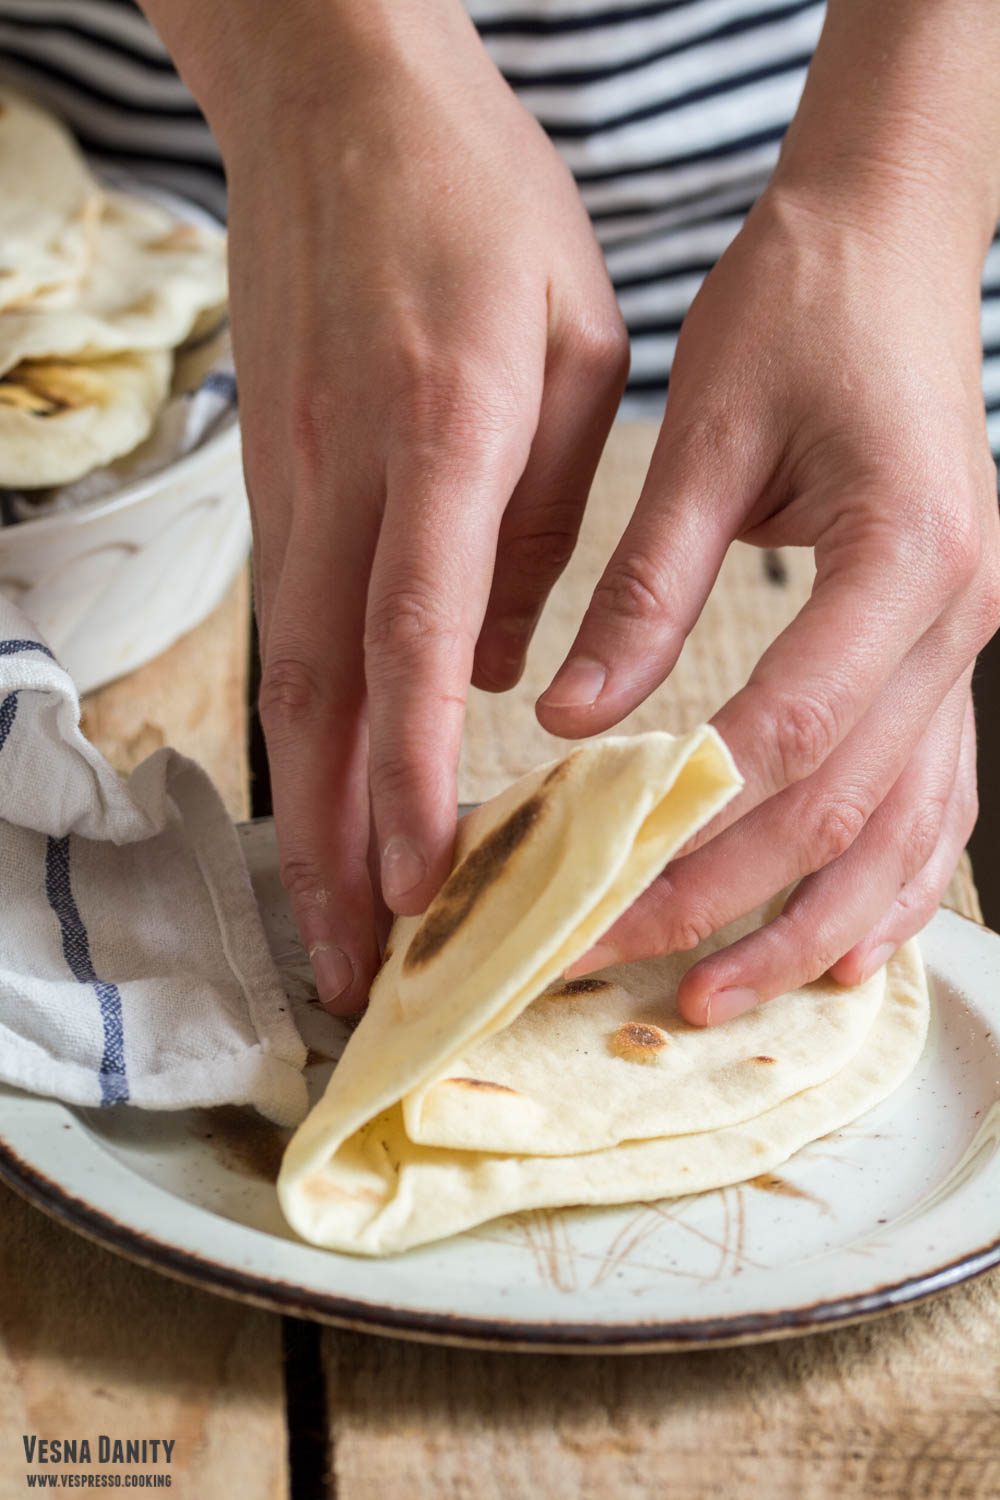
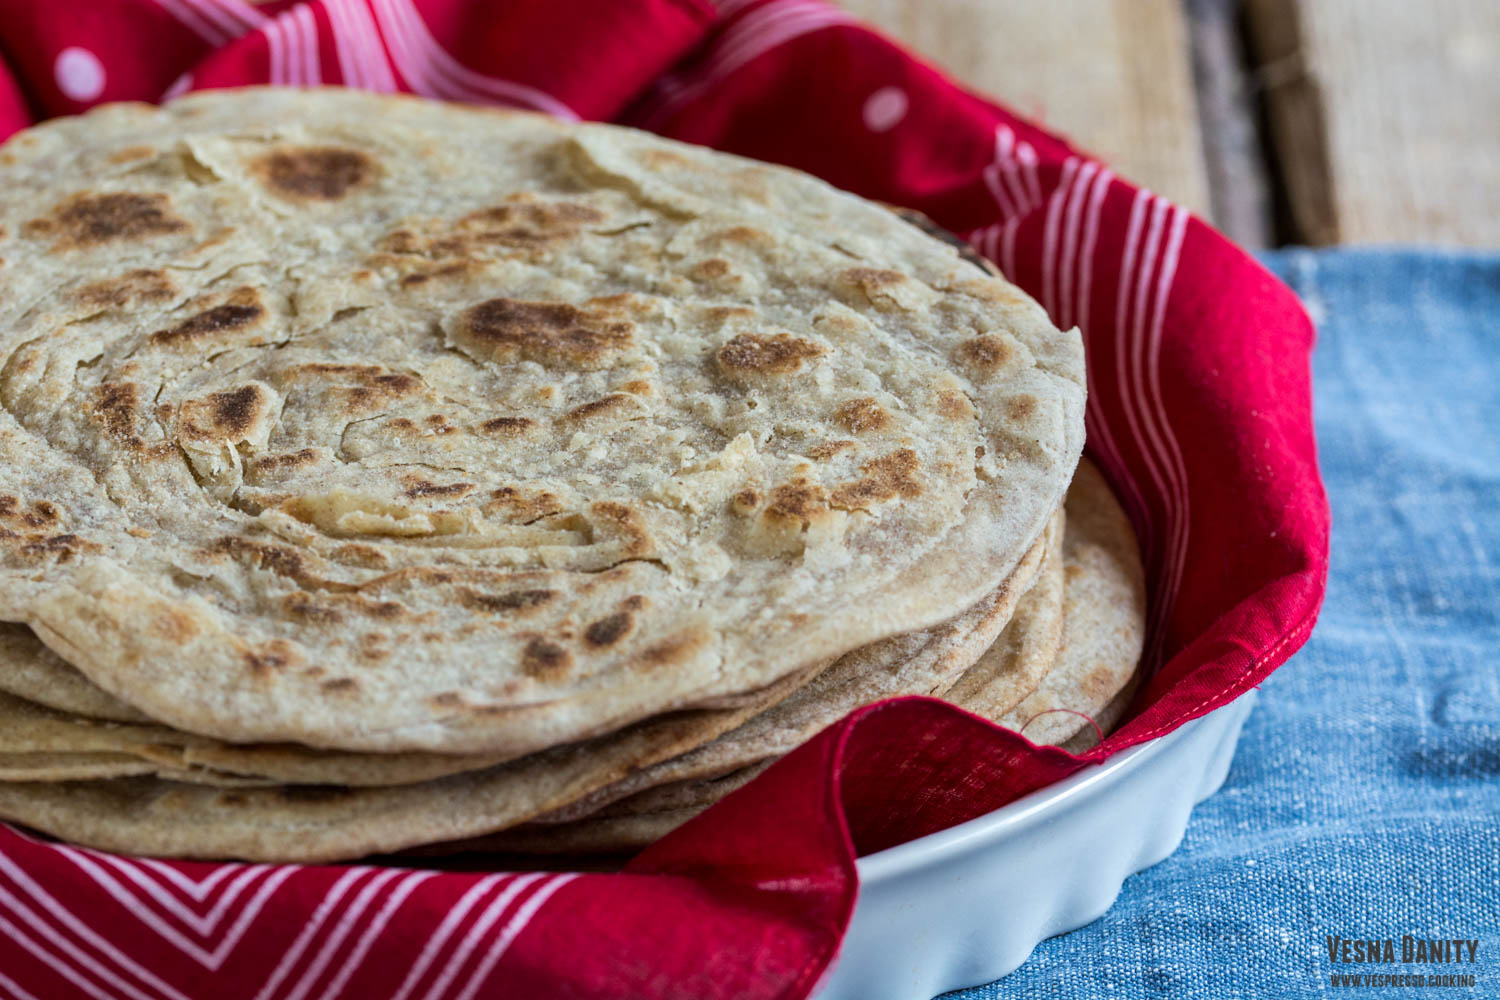
  8. Cook. Heat a cast iron skillet over medium heat. When you see pockets of air forming at the surface brush the raw surface with oil and flip it. Brush the cooked surface with olive oil too. Flip it again and cook until golden brown.
  9. Repeat with the other pieces of dough. Proceed the same with the remaining flatbreads. I prefer to roll the second one while the first one is cooking. It saves times.
  10. Serve. Serve warm with curry, chutney or different vegetable spreads.


Farro Salad with Mushrooms and Pickled Onion

Farro (also known as emmer) is an ancient grain with a chewy texture and a subtle nutty flavor. Farro is an excellent source of fiber, protein, vitamin B complex and microelements (such as magnesium, iron and zinc).

Farro is usually cooked like pasta, so it is practically boiled in salted water. The cooking time usually varies between 25 and 45 minutes, it is ready when it’s tender but still a little bit chewy. Today I served it in a divine salad, topped with sauteed mushrooms and pickled onion. This salad is simple yet elegant, light yet hearty, packed with nutrients and bold flavors. I started the salad by boiling the farro and while the farro was on the stove, I pickled the onion slices in a brine made with water, brown sugar and apple cider vinegar. To this brine I added a sliced beet which gave the onion ribbons a wonderful, almost hypnotic strawberry-red color. While my farro was simmering and my onion was pickling I sauteed some champignon mushrooms in some chili-flavored olive oil. And this is how my all-time favorite salad was born!

Ingredients (for 2 servings):

  • 150g uncooked farro
  • 250g champignon mushrooms
  • 2 Tbsp olive oil
  • 1 Tbsp lemon juice
  • 1/8 tsp chili powder
  • 2 garlic cloves
  • 1 small red onion
  • 1/2 cup water
  • 2 Tbsp brown sugar
  • 2 Tbsp apple cider vinegar
  • 1 small red beet

Method:

  1. Fill a large saucepan with water, add 1 Tbsp of salt, cover with a lid and bring to a boil. Add the farro, reduce the heat to minimum and simmer for 25 – 45 minutes (cook according to the instructions on the package; farro is cooked when it’s tender but still a little bit chewy).
  2. Meanwhile peel the beet with a vegetable peeler, slice it and place it in a small saucepan. Peel the onion, halve it, slice it finely and add it to the saucepan. Add 1/2 cup of water, 2 Tbsp of sugar and 2 Tbsp of vinegar. Place it on the stove over medium heat and bring it to a simmer. Lower the heat to medium and simmer it for 1 minute. Leave it aside to marinade.
  3. Clean the mushrooms with a clean sponge. Remove the stems and halve the caps. In a large skillet heat 1 Tbsp of olive oil over medium-high heat. Season it with chili and add the mushrooms (caps + stems). Sautee until the mushrooms become golden brown and the liquid has evaporated. Add the minced garlic and chopped thyme and cook for further 60 seconds, stirring continuously. Deglaze the pan with 1 Tbsp lemon juice and leave aside to cool down.
  4. When the farro is cooked, drain the excess water, rinse under cold water and drain well using a colander.
  5. Remove the excess liquid from the pickled onions and discard the beet slices.
  6. To assemble the salad mix together the farro with the sauteed mushrooms. Add 1 Tbsp of olive oil and season with salt. Divide the salad between two plates and garnish with pickled onion ribbons.
  7. Place the leftovers (if any) in a bowl, cover with cling film and refrigerate for up to 2 days.


Source: www.cookieandkate.com

Fast One-Hour Buns


I love everything that remotely resembles to bread, but if I’d have to choose between a slice of bread and a bun I’d choose the latter. And I have 2 main reasons:

  1. I’m the “crust” type of person, the crunchier, the better.
  2. I’m incapable of evenly slicing a bread. And I’ve tried. A lot. And don’t get me started on the cake-slicing topic.

These being said, I think I found the perfect buns. They are dense without being tough and they have a wonderful crunchy crust. Oh, I almost forgot the best part. These buns are made in 40 minutes.

Ingredients (for 10 Buns):

  • 250g strong white flour (+ extra 10g for kneading)
  • 25g beaten egg (1/2 egg)
  • ¼ tsp salt
  • 120ml lukewarm water (36-38°C)
  • 35ml Tbsp olive oil
  • 15g granulated sugar (I used packed brown sugar)
  • 1 envelope active dry yeast (7g)
  • Method:

    1. Preheat the oven at 400°F/204°C (gas mark 6).
    2. In a small bowl combine water, oil, sugar and yeast and let aside for 10 minutes. After 10 minutes, the mixture should be really foamy (picture).
    3. In a large bowl combine white flour, oat flour and salt and make a well in the center.
    4. Add the yeast mixture and ½ an egg and mix with a wooden spatula until you form a ball.
    5. Bring the sticky dough on a floured working surface and knead it for 2 minutes.
    6. Place dough in the bowl, cover and let it rise in a warm place for 10 minutes.
    7. After 10 minutes, place the dough back on the working surface and knead vigorously to knock out the air bubbles.
    8. Divide dough into 10 pieces and shape them into 10 balls (I had 10 balls x 53g).
    9. Place them on a tray lined with parchment paper, give them a quick egg wash, sprinkle some cumin seeds and bake them for 12 minutes or until golden.


    Source: www.kitchemeetsgirl.com

Homemade Flour Tortilla


I can’t remember last time I had a store-bought tortilla. I always make my own tender and delicious tortillas. These flatbreads are so easy to make, they taste incredible and they are also budget-friendly. I usually use olive oil in this recipe because I love its flavor but any other vegetable oil works just fine.
Continue reading Homemade Flour Tortilla

Chicken Lollipops with Tomato-Chili Sauce


Chicken lollipops are always a great idea, whether you have to prepare a party buffet or a simple lunch. Underneath their crispy crust lays a tender, juicy and flavorful meat. It is a wonderful dish, yet quite simple and budget-friendly.

I make lollipops very often and every time I use only the drumettes (the thick part of the wing, the part that has only one bone). I generally marinate the drumettes with a lemon, olive oil, garlic and sage mixture and I refrigerate them overnight. Yesterday I did the same thing and this morning I prepared some flavorful, tender and adorable lollipops. They were simply amazing but I decided to serve them with a spicy tomato and chili sauce which made them even better.

Ingredients (for 6 servings):

  • 12 drumettes
  • ¼ cup all-purpose flour
  • ½ cup bread crumbs
  • 1 egg
  • 1 Tbsp milk
  • ¼ tsp salt
  • ¼ tsp pepper

for the marinade:

  • 1 Tbsp olive oil
  • juice and zest from half a lemon
  • 1 tsp soft brown sugar
  • 3 garlic cloves
  • 7 sage leaves
  • ½ tsp sea salt
  • ¼ tsp pepper

Method:

  1. Prepare the marinade by mixing in a large bowl all the ingredients above.
  2. Prepare the drumettes. Grab the thin part and cut the skin and the ligaments surrounding the bone. Scrape the bone with a knife and pull the meat up, towards the thick end. Carefully pull the meat over the fat to create a sphere (picture).
  3. Place the drumettes in the marinade bowl and toss to cover. Place them in a zip-lock bag and refrigerate for at least 4 hours.
  4. Remove them from the refrigerator and take 3 bowls; place the flour in the first bowl, the bread crumbs in the second bowl and the egg, milk, salt and pepper in the third.
  5. Roll the drumettes in the flour, dip them in the egg mixture and then in the bread crumbs.
  6. Deep-fry them at 340°F/170°C for 7-8 minutes, until golden brown.
  7. Carefully remove them from the oil and place them on a paper towel.


  • Tomato and chili sauce

    Ingredients (for 6 servings):

    • 1 Tbsp olive oil
    • 1 onion, chopped
    • ½ small carrot, grated
    • ½ celery stalk chopped
    • 2 garlic cloves
    • 1 chili, chopped
    • 30ml dry red wine
    • 1 chopped tomato tin (400g)
    • 1 bay leaf
    • 1 tsp fresh thyme, chopped
    • ½ tsp sugar
    • ¼ tsp salt
    • ¼ tsp pepper


    Method:

    1. Heat the oil in a saucepan and add chopped onion, carrot, celery and chili to the pot. Cook on high heat, stirring occasionally, until the onion is translucent (about 5 minutes).
    2. Add minced garlic, bay leaf and thyme and cook for 1 minute.
    3. Add wine and cook until the liquid is reduced by half.
    4. Add tomatoes and cook uncovered, on low heat for 30-40 minutes until all the liquid has evaporated.
    5. Discard bay leaf, add sugar, salt and pepper and puree the sauce using a blender. Serve warm with chicken lollipops.


Grilled Quail Eggs With Sweet & Salty Sesame Dust

These soft boiled quail eggs are marinates in soy sauce, charred on the grill and served with a sweet and salty sesame dust. Given my almost annoying culinary curiosity and the fact that I never run short of eggs, I often discover new and exciting quail egg recipes. This recipe is definitely exciting, it is both visually pleasing and extremely delicious. Not to mention that the technique is really simple.

Ingredients (for 4 servings):

  • 24 quail eggs
  • 2 Tbsp soy sauce
  • 1 Tbsp olive oil
  • 1 Tbsp sesame seeds
  • 1/4 tsp salt
  • 1/4 tasp dark Muscovado sugar
  • 1/8 tsp chili powder


Method:

  1. Fill a medium saucepan with water and cover with a lid. Bring the water to a boil and add the eggs. Reduce heat to minimum and let eggs simmer for 2 minutes. Drain eggs, let them cool in cold water and peel them.
  2. Take a zip-lock bag and prepare the marinade by mixing together the soy sauce and the olive oil.
  3. Rinse the soft-boiled eggs, pat them dry and add them to the bag. Mix well and leave the eggs to marinate for 30 minutes.
  4. Meanwhile toast the sesame seeds in a skillet until golden brown over medium temperature. Let them reach room temperature and spoon them in a mortar. Add the salt, sugar and chili and break the seeds down with a pestle.
  5. Heat grill pan over medium – high temperature. Drain the eggs and carefully place them on the grill. Grill them for 20 -30 seconds on each side, until browned.
  6. Serve them warm, on a skewer, dipping them in the sweet and salty sesame powder.

Source: www.ottolenghi.co.uk


Zucchini Pasta alla Marinara (Raw Vegan)


I’ll give you four reasons why these marinara zoodles are amazing:

  1. since they aren’t cooked using heat, these noodles are an excellent method to include more raw nutrient-packed fruit and vegetables in your diet
  2. since it’s a raw dish, you don’t need a heat source, a detail which is most welcomed on these hot summer days
  3. this dish doesn’t take more than 15 minutes, form picking the tomatoes to garnishing the dish with the irreplaceable basil leaf
  4. since it’s august, the organic garden tomatoes are ripe and juicy, which brings a delicious flavor to the dish

The veggie spiralizer does an amazing job, but if have some spare time, it can be replaced with just a cutting board and a sharp chef’s knife. You just have to cut the zucchini in parallel ½ a centimeter – thick slices. Then you have to cut each slice into thin noodles. Obviously, it tends to be a rather laborious job, but it surely does the trick. Continue reading Zucchini Pasta alla Marinara (Raw Vegan)

Farfalle Caprese

This lovely pasta salad with tomatoes, mozzarella and fresh basil is ready in fifteen minutes. Fifteen minutes on the clock! It is hearty, it’s colorful and it’s packed with bold flavors! It’s hands down my favorite salad and I’ve been making it since the Cretaceous period, since I was in the second grade to be more accurate. This salad is perfect for lunch or dinner and it’s also a wonderful dish to bring to a picnic.

For this salad I used mozzarella boconcini and cherry tomatoes picked from my own veggie garden, which I’ve seasoned with fresh basil and homemade balsamic vinegar reduction. For pasta I chose farfalle (penne, fusilli or rigatoni are also delicious in this salad) which I’ve flavored with finely chopped shallot. Although I cannot tolerate onion in traditional Caprese salad, I always add finely chopped shallot in the pasta version. I find that it seasons discretely the pasta, without overpowering the rest of the ingredients. Continue reading Farfalle Caprese

Duck Egg Frittata with Zucchini and Parmesan


Duck egg frittata with zucchini is the answer to the question “what can I make for dinner from basically nothing and in less than 20 minutes?”. Frittata is such a simple dish, it requires about 4 or 5 ingredients and a non-stick pan (my cast iron skillet works great). This fancy omelet is so satisfying, creamy and flavorful and it practically prepares itself. I like to pair it with a crusty slice of bread and with a large bowl of salad, and that’s how I get a tasty vegetarian dinner in no time.

Duck eggs are quite fatty, which makes them absolutely tasty, although they are a great source of omega 3 fatty acids, they also provide a large quantity of cholesterol which doesn’t make them suitable for daily consumption. On the other hand, duck eggs are also a great source of vitamin B complex, vitamin A, selenium and phosphorus. So, eaten in moderate amounts, duck eggs are not delicious, but also nutritious. Continue reading Duck Egg Frittata with Zucchini and Parmesan

Lentils and Watermelon Salad with Grilled Corn (Vegan)


I can’t say I often come across such an interesting salad. This salad is quite special, it has a lovely flavor profile, great colors and wonderful textures. At first sight it is a simple, summery salad, with seasonal, budget-friendly ingredients. But when you taste it, it’s impossible not to fall in love. The earthy sweetness of the grilled corn goes wonderfully with the fragrant juiciness of the watermelon and the smooth, almost creamy texture of the lentils. These three tasty ingredients are deliciously bonded together by chopped chives and lemon juice.

Lentils pack this salad with protein which makes it surprisingly satisfying. It is perfect for lunch, dinner and picnic and it is a genius way to use that big slice of watermelon that has been patiently waiting in your fridge for days. Continue reading Lentils and Watermelon Salad with Grilled Corn (Vegan)