Tortilla Soup (Vegan)


Hearty and flavorful, this Mexican – inspired soup is the best option whenever you feel like eating something satisfying and flavorful but time isn’t exactly your best friend. The juxtaposition between the hearty and tangy soup and the crunchy tortilla croutons is simply wonderful. This dish is ready in practically no time and it requires only budget-friendly ingredients. It’s so tasty that I find it simply impossible to limit myself at just one bowl. It’s packed with veggies, each and every one of them doing its own thing, transforming this dish into a color and flavor symphony. Simply amazing…

Ingredients (for 6 servings):
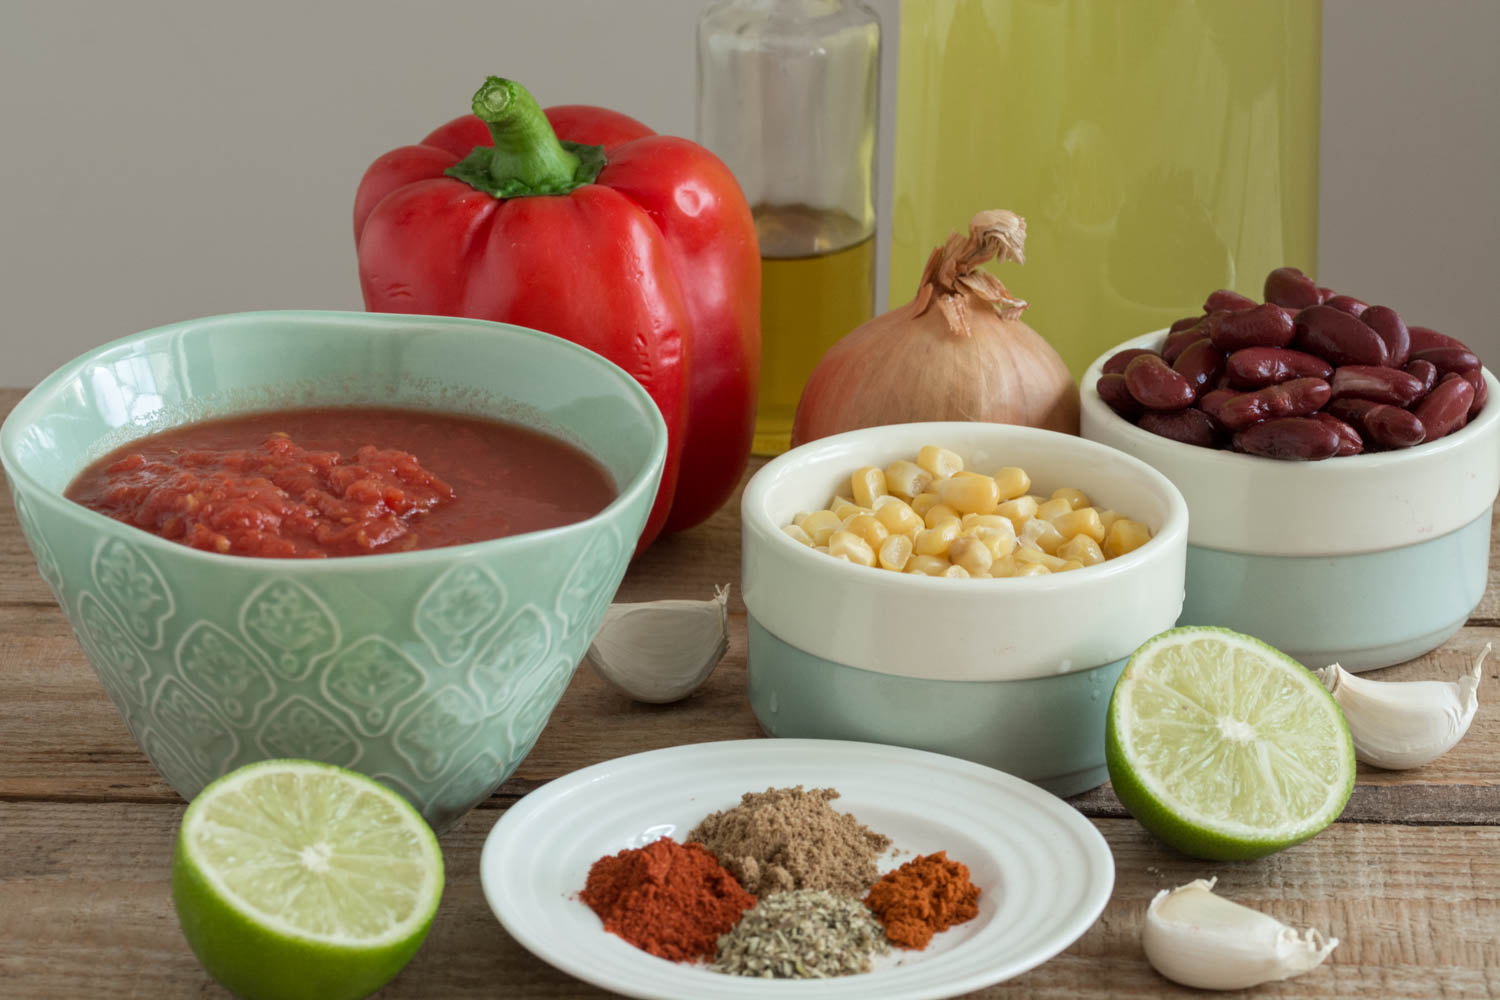
  • 1 can of corn
  • 1 can of red kidney beans
  • 1 can of chopped tomatoes
  • ½ red bell pepper
  • 1 medium onion
  • 3 garlic cloves
  • 3 Tbsp olive oil
  • 800ml vegetable soup
  • juice of 1 lime
  • 1 tsp oregano
  • 1 tsp cumin
  • 1 tsp paprika
  • ¼ tsp chili

for the tortilla croutons:

  • 2 large tortillas
  • 2 tbsp olive oil
  • 1 tsp brown sugar
  • ¼ tsp cumin
  • ¼ tsp paprika
  • ¼ tsp garlic powder
  • ¼ tsp salt


Method:

Preheat de oven at 400°F/204°C (treapta 6). 

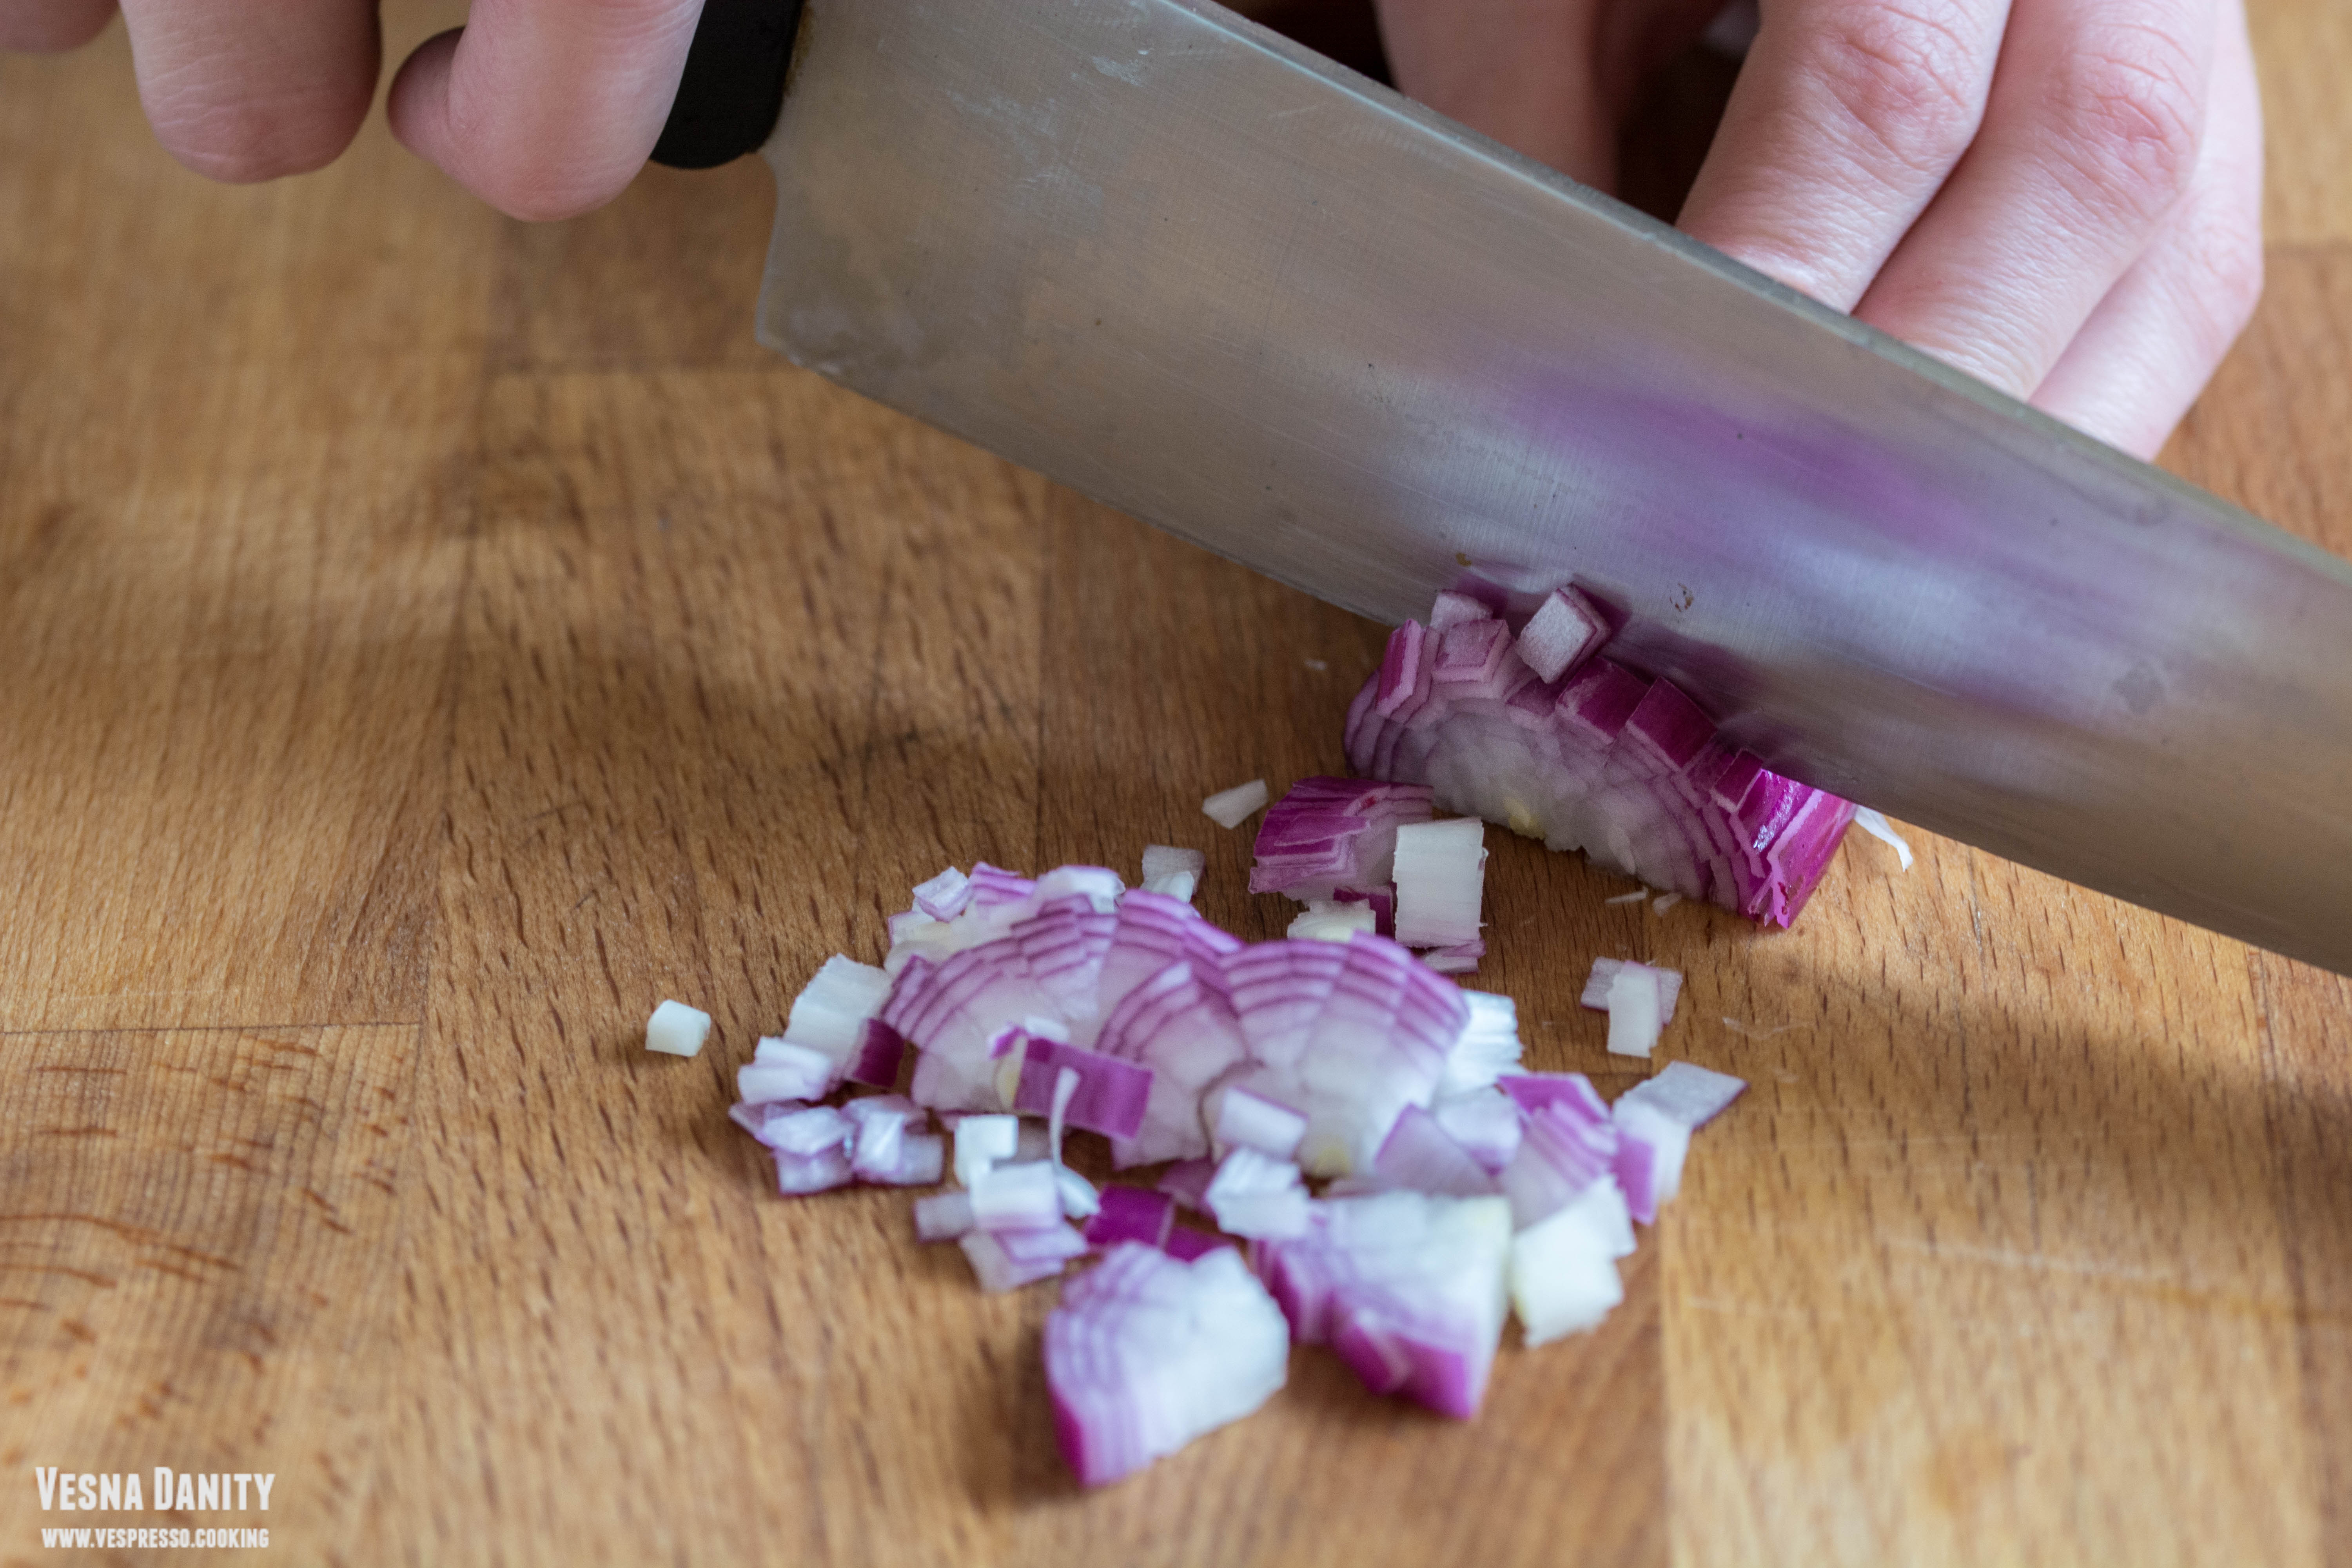
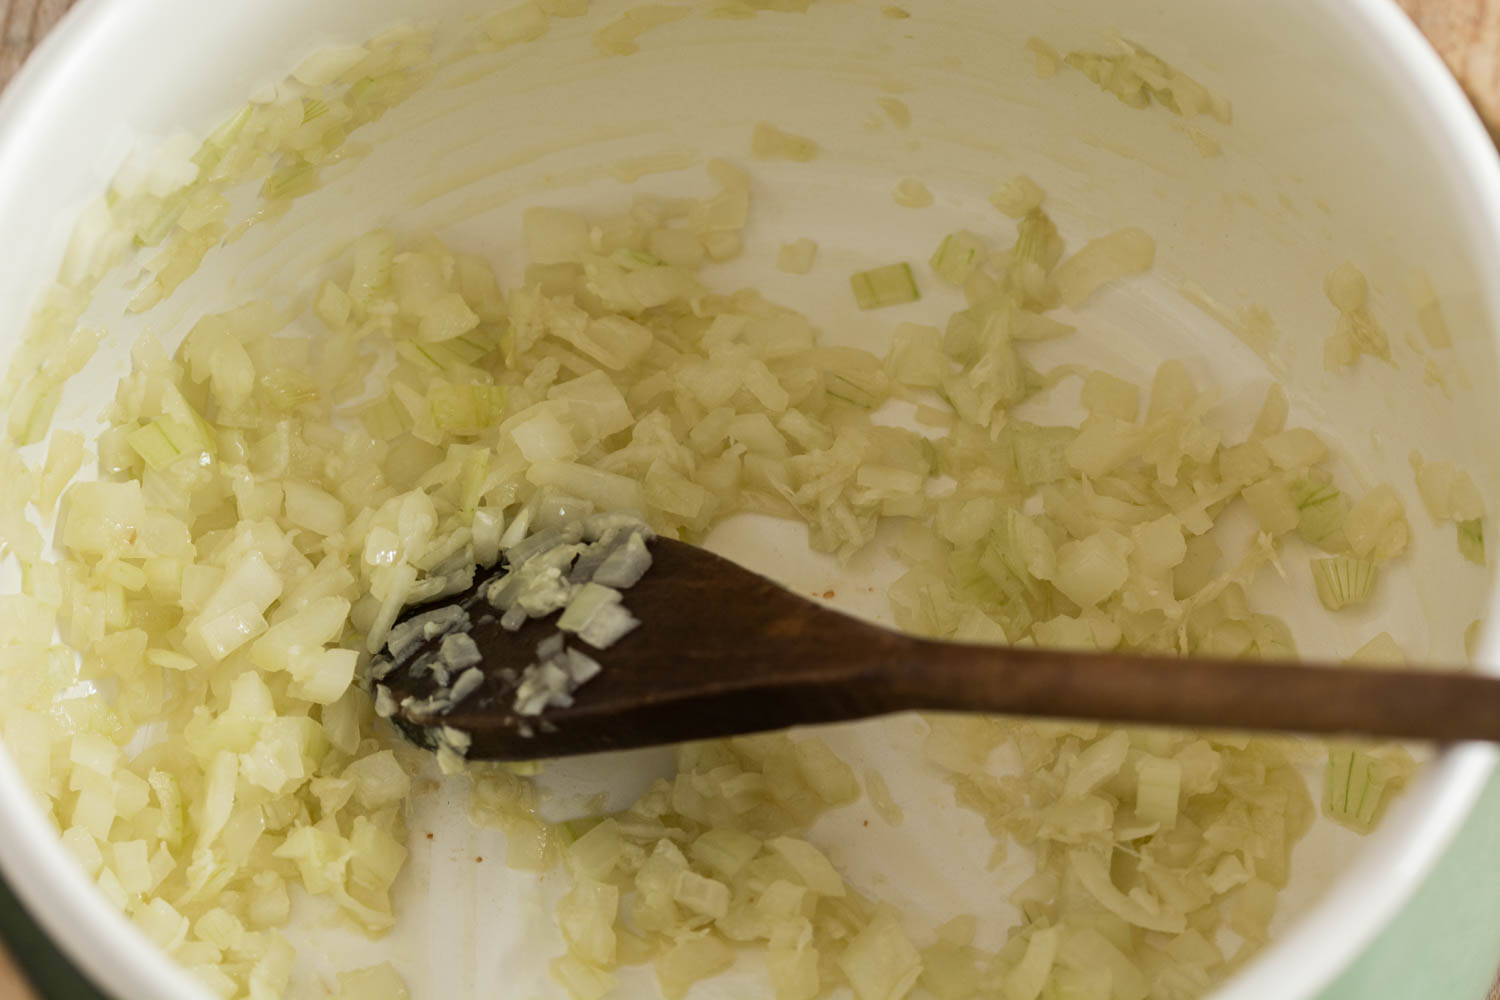
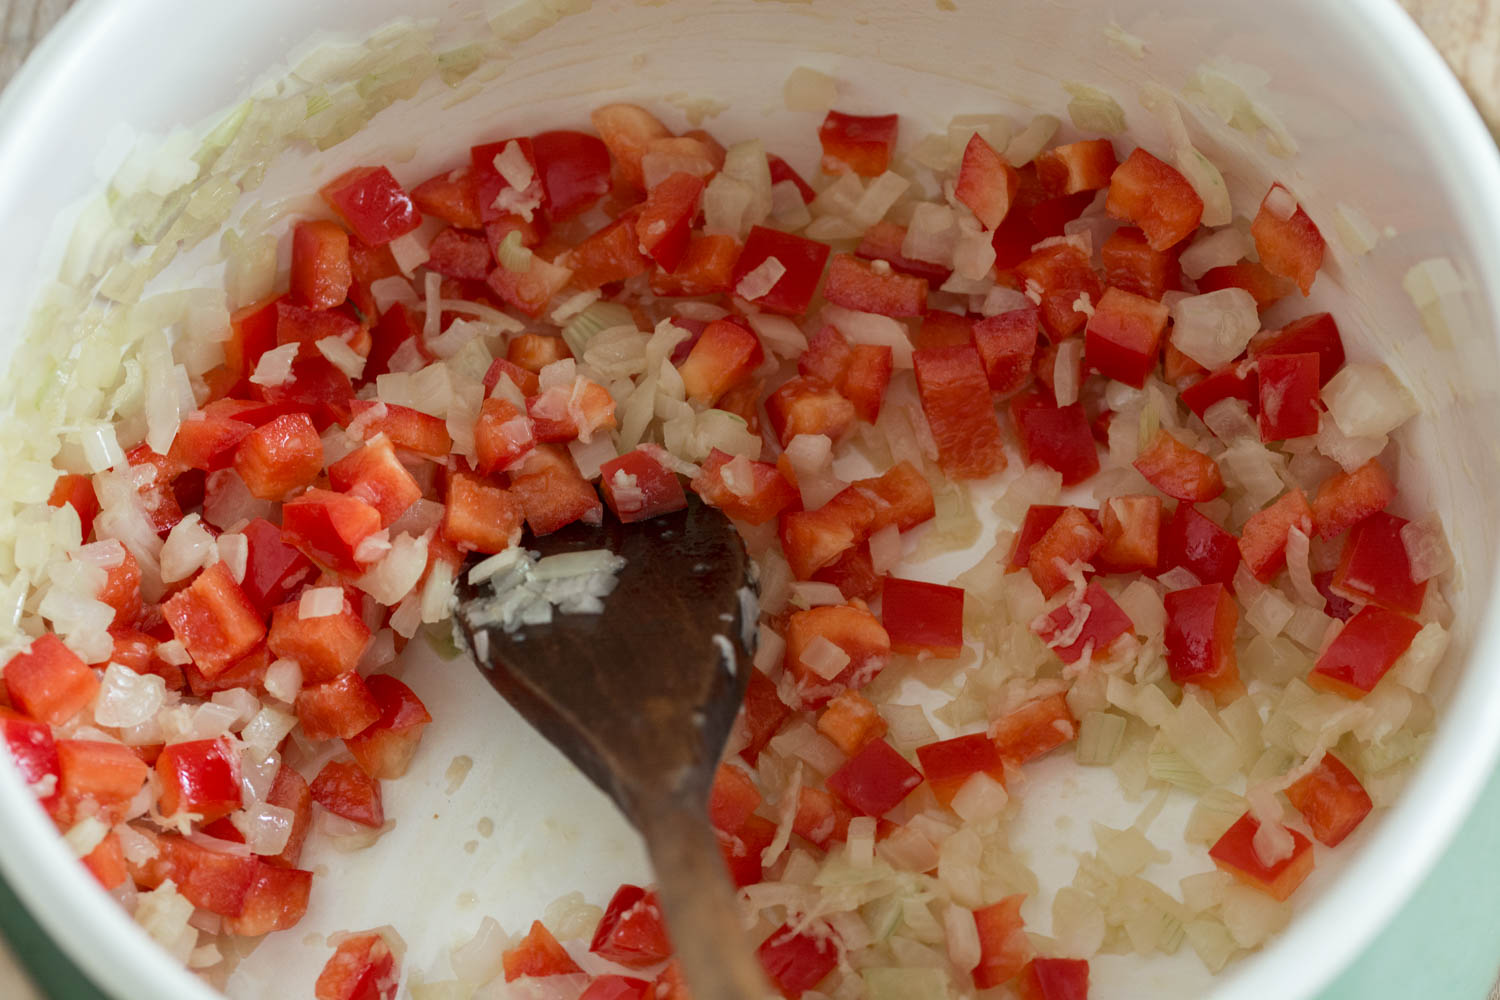
Peel the onion and give it a chop. Remove the seeds from the red bell pepper and cut it into small cubes. Peel the garlic and mince it.

Preheat the olive oil in a large saucepan over medium heat and sautee it until translucent. Add the minced garlic and sautee it as well until fragrant. Add the spices and give the ingredients a stir.

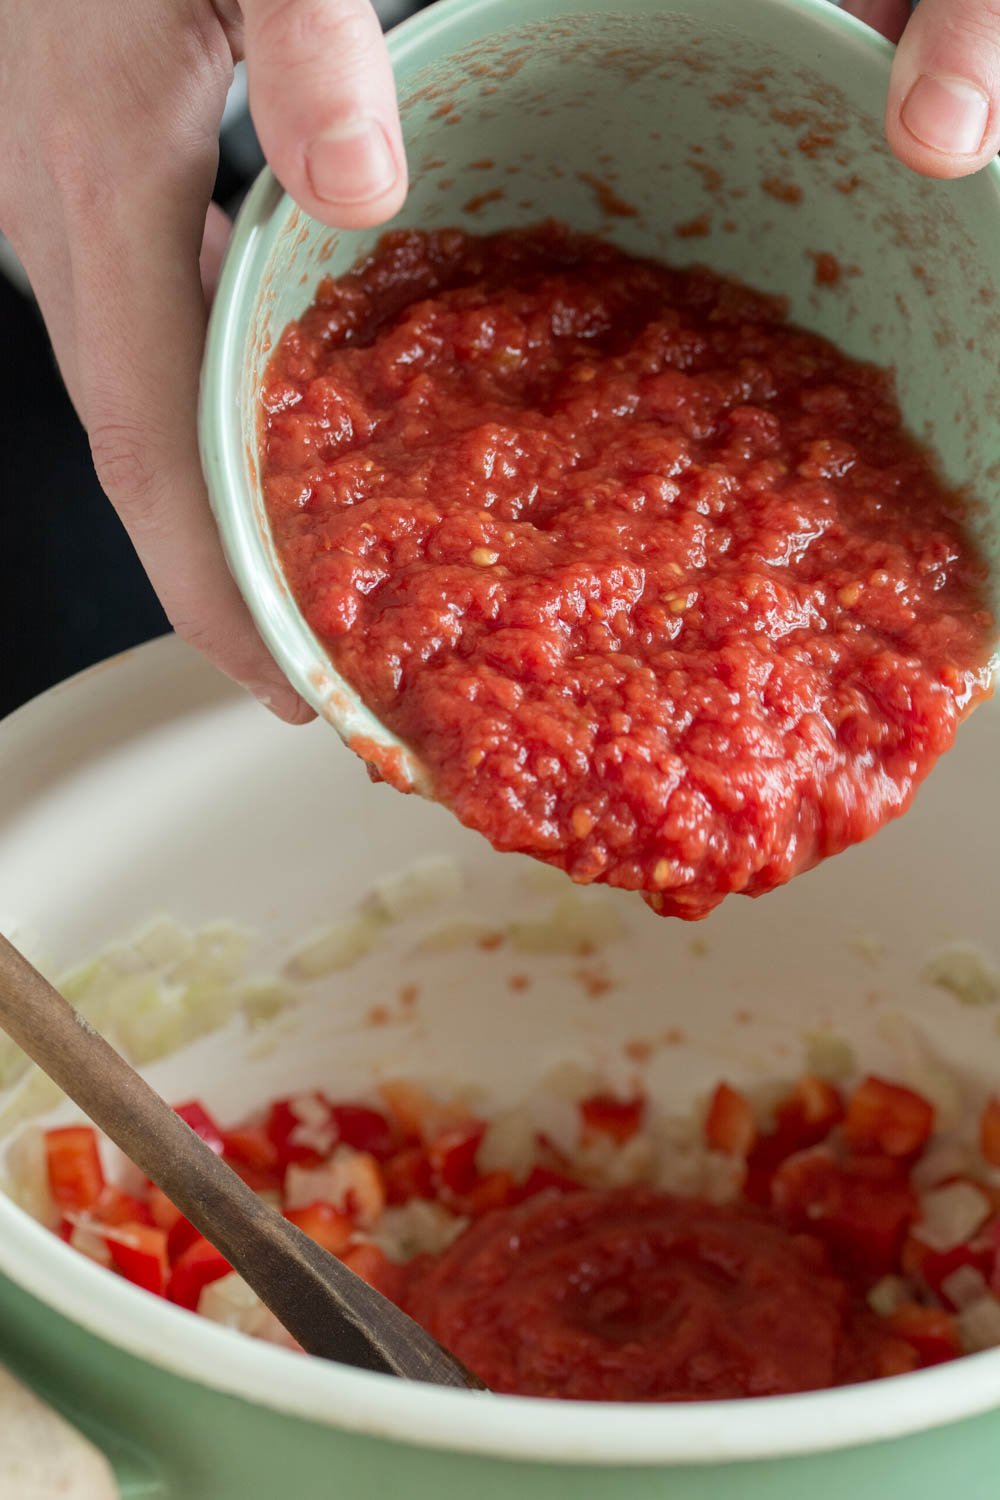
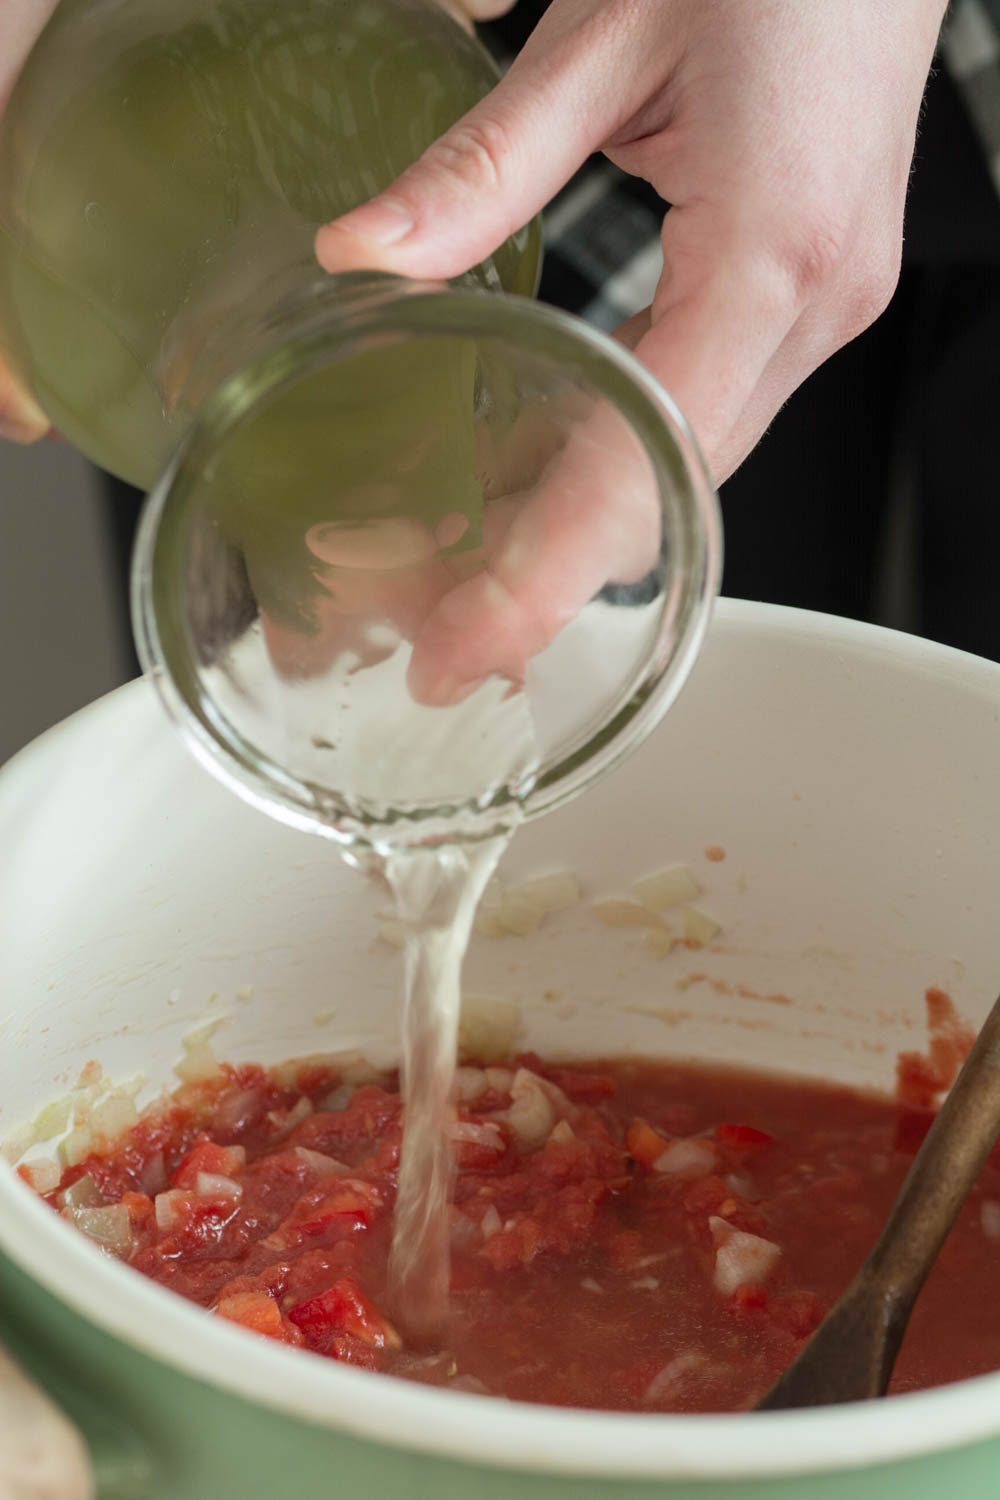
Add the canned tomatoes and the soup and bring the pot to a boil. Simmer the soup for about 5 minutes.

Add the beans and the corn and boil it for about 15 minutes.

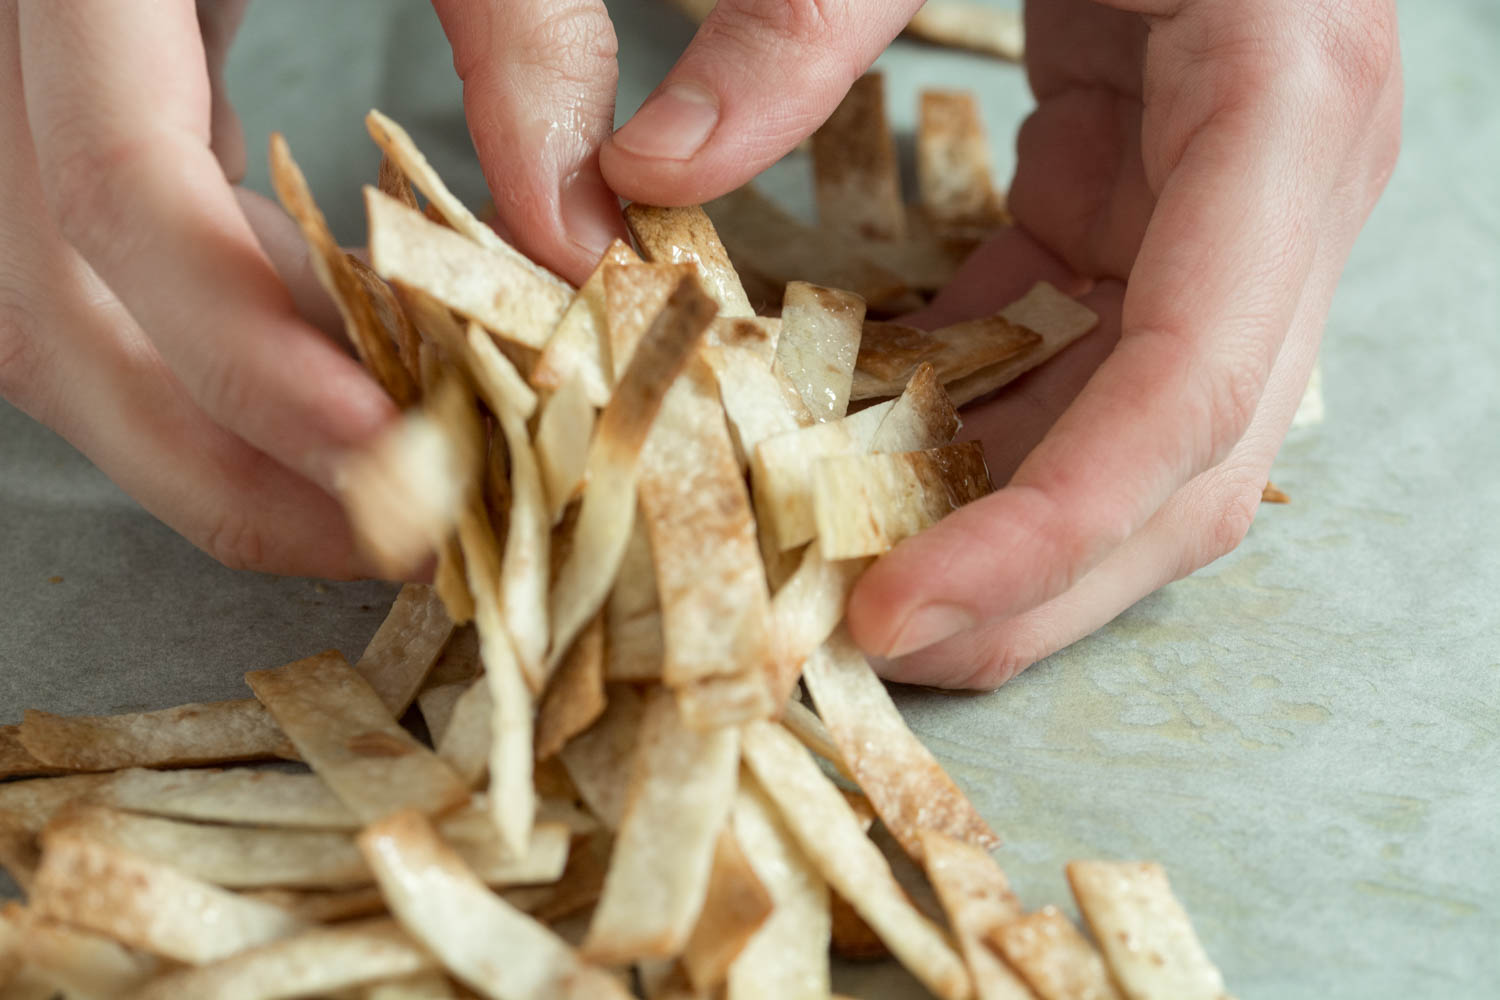
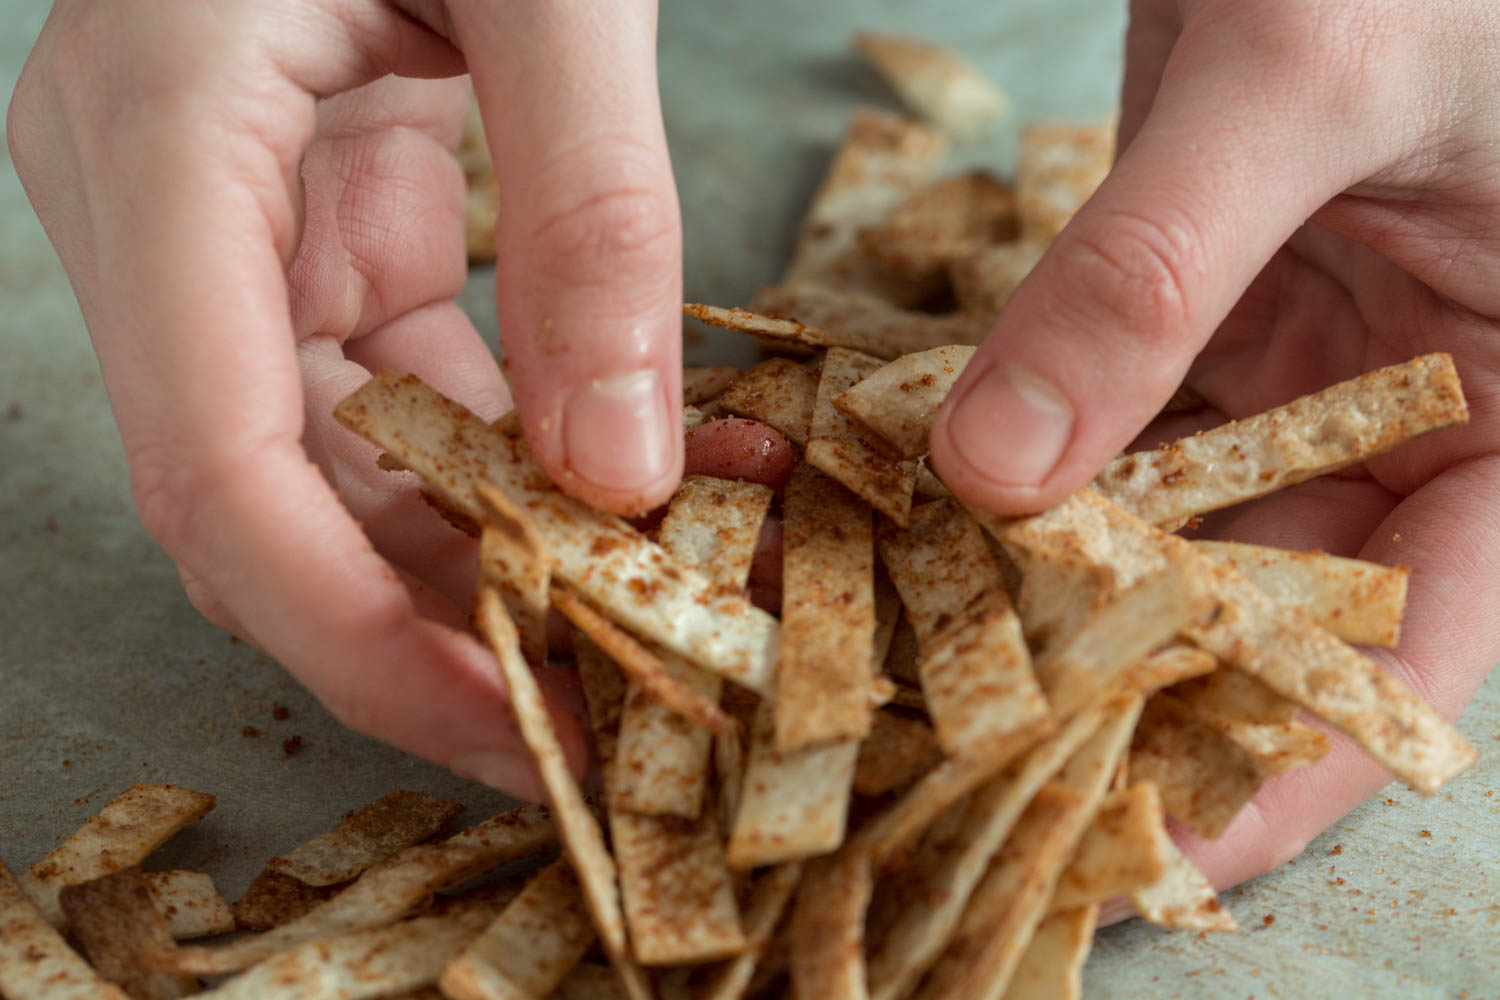
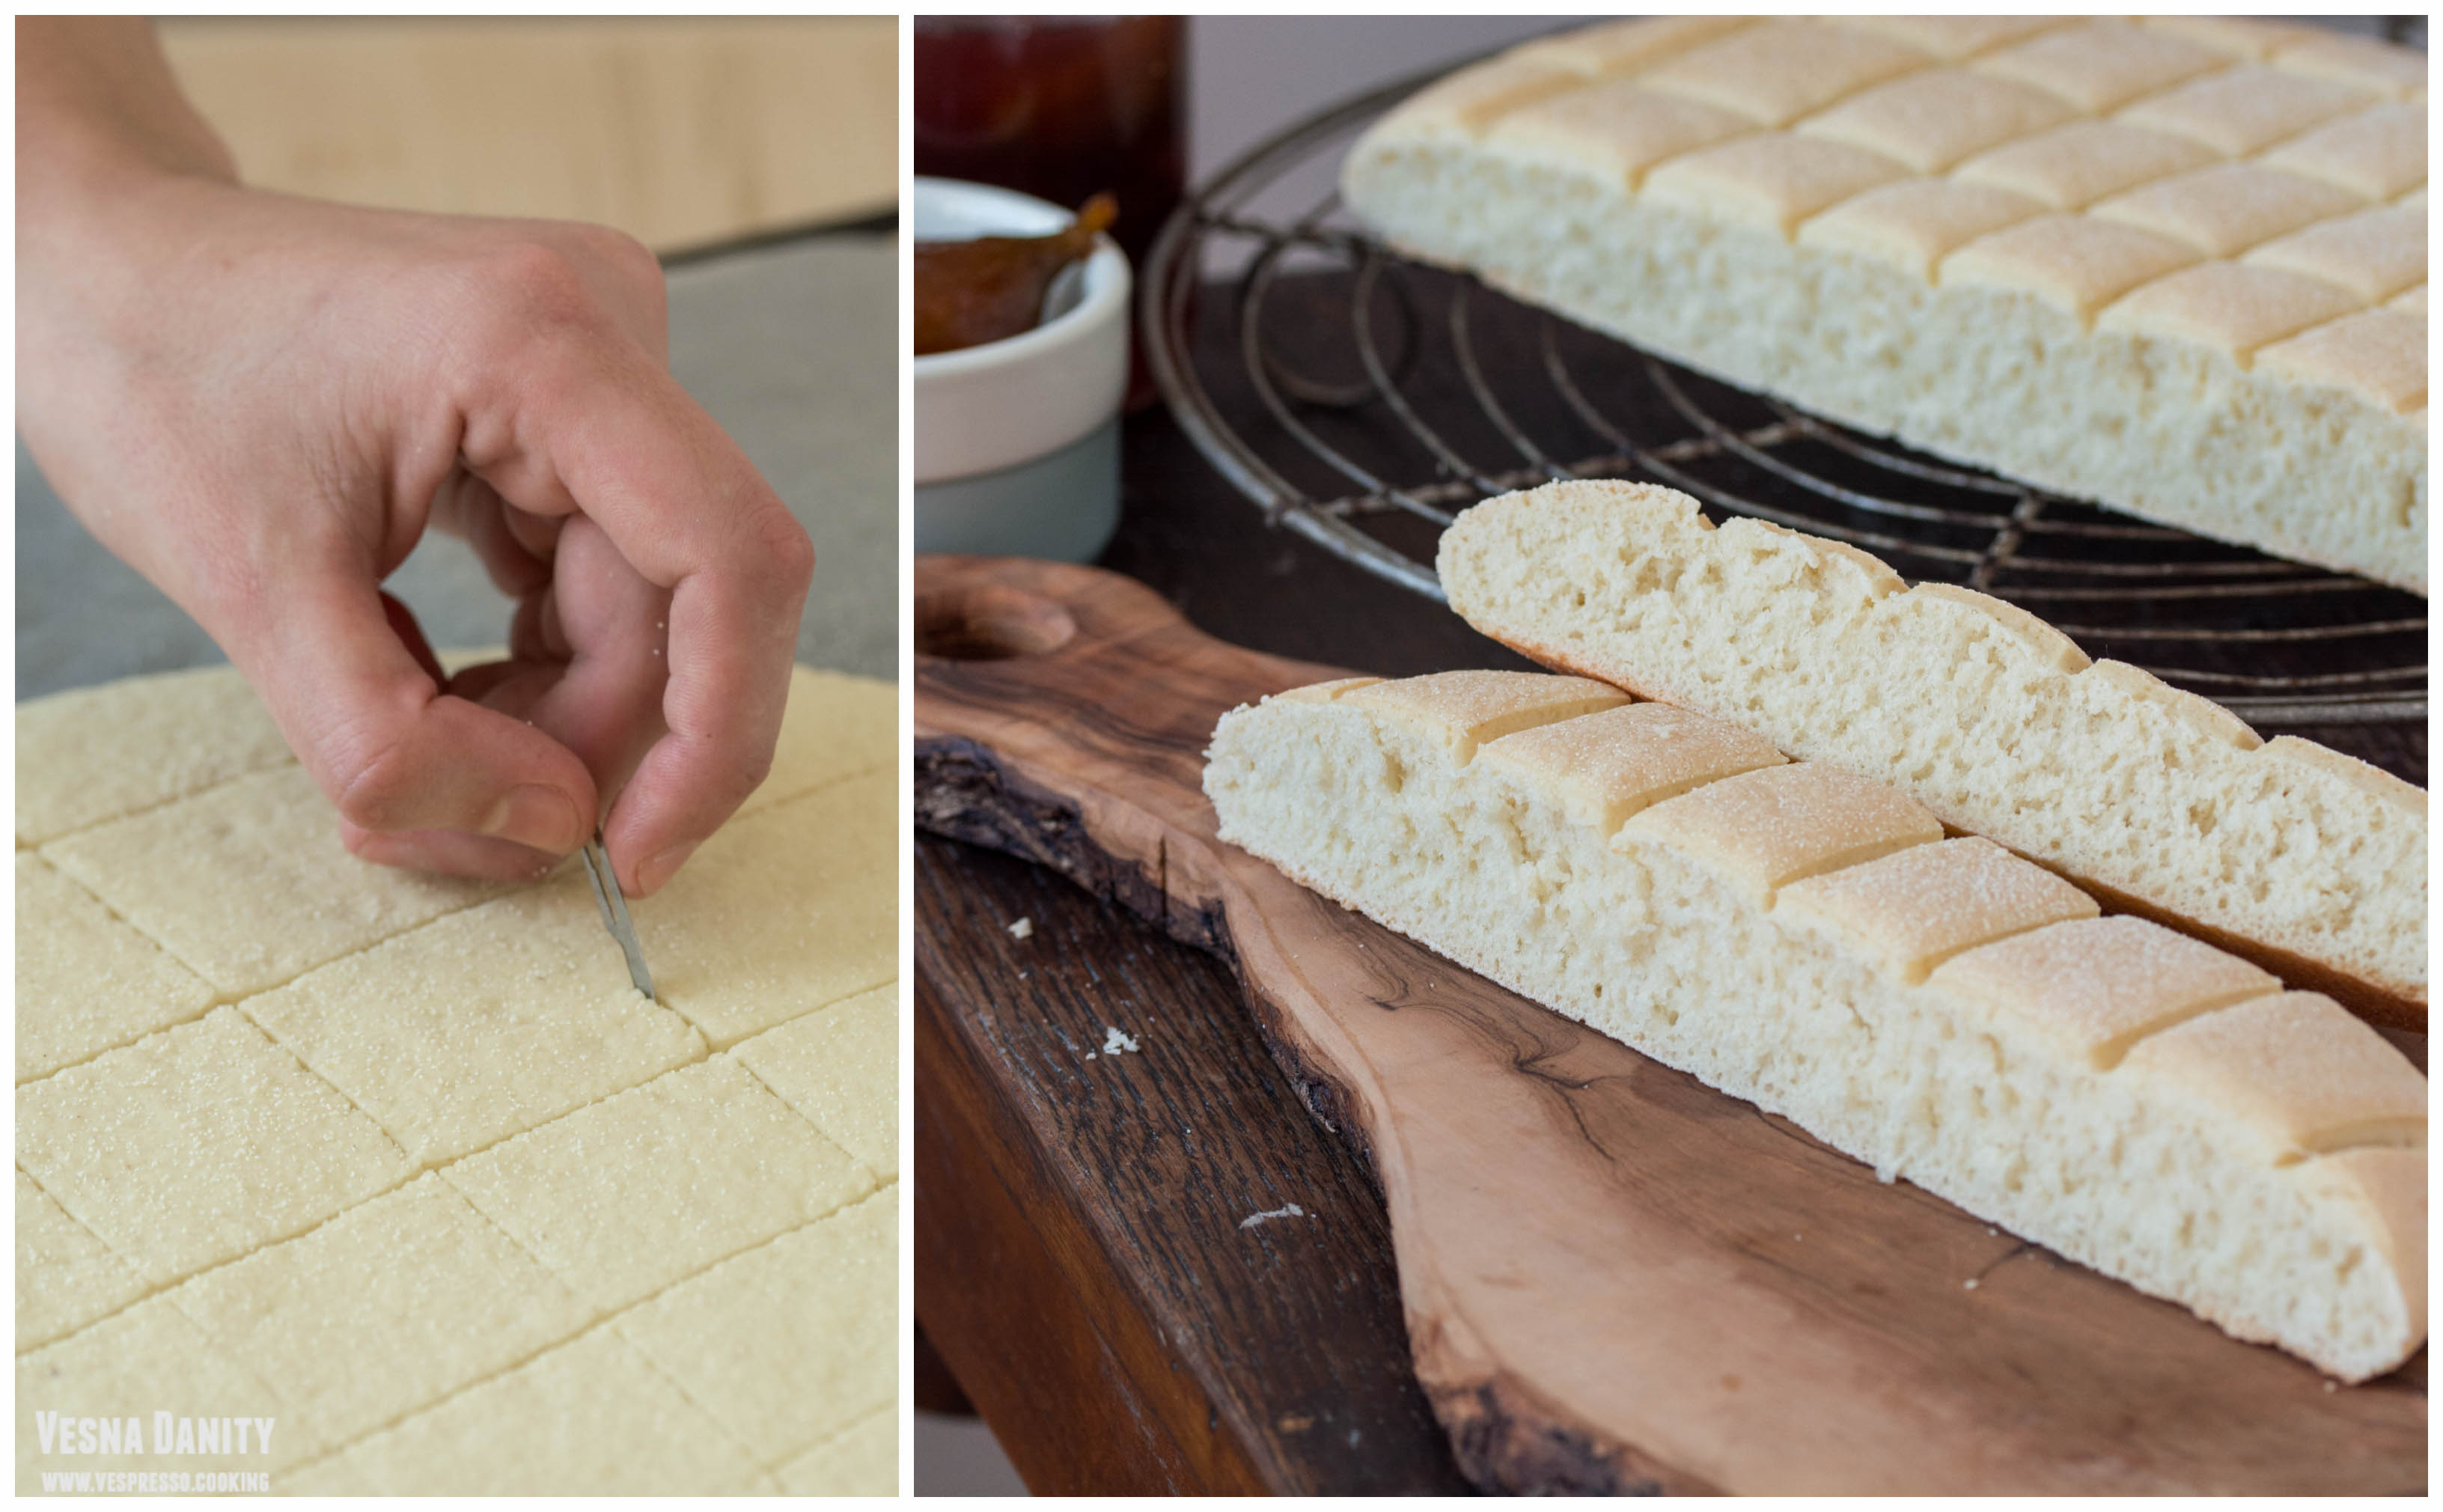
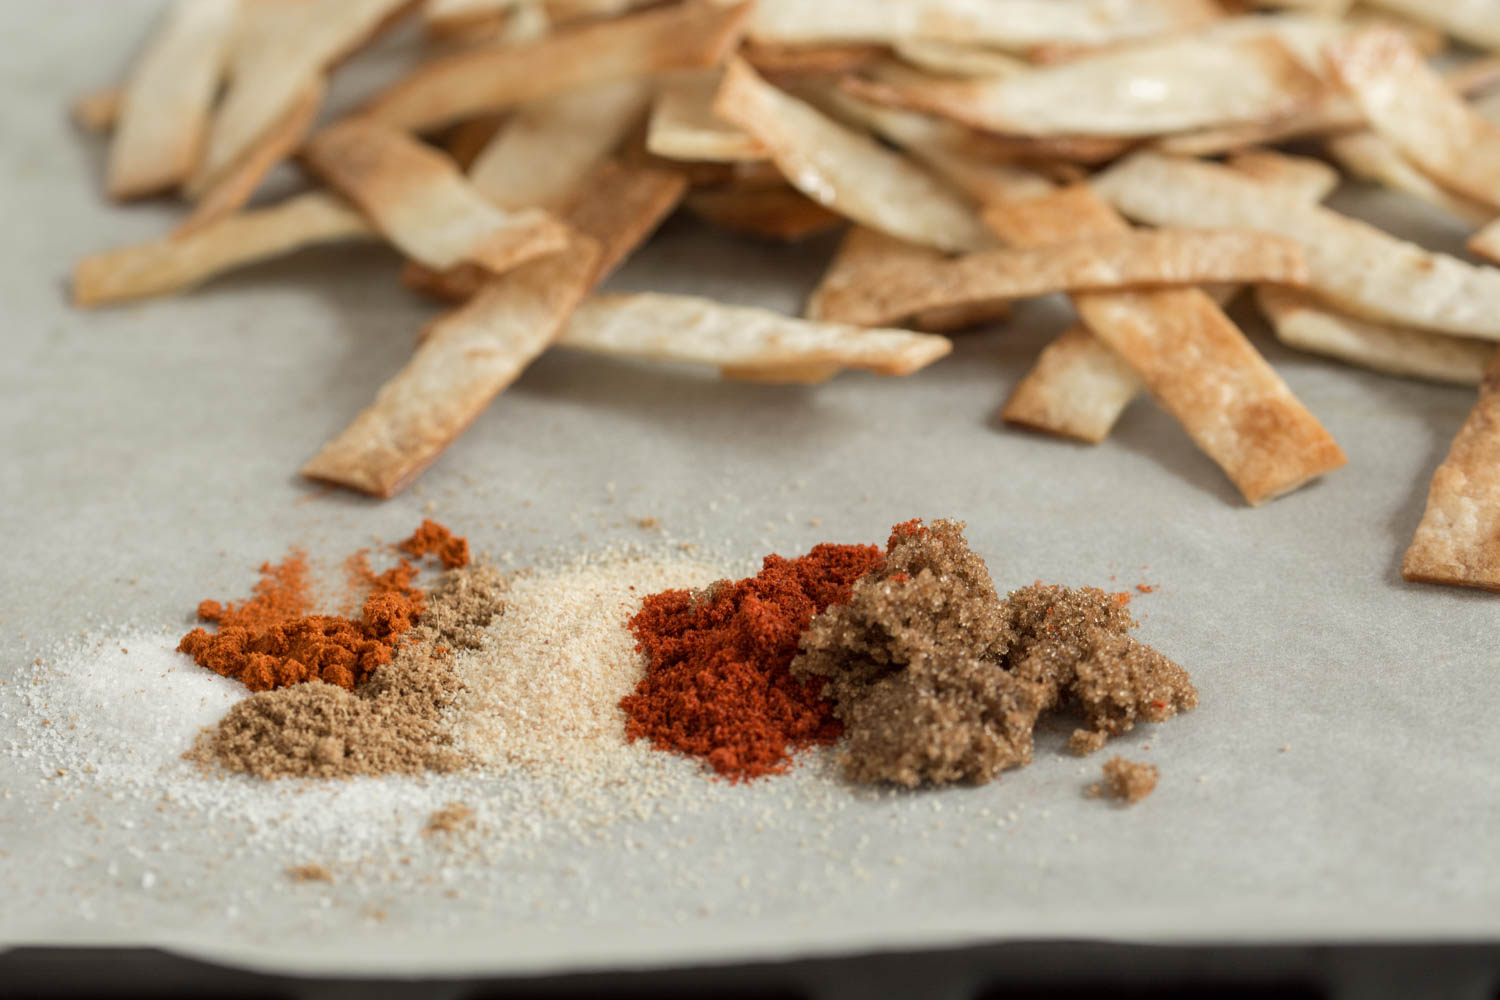
Meanwhile prepare the tortilla croutons. Slice them into 2 cm thick ribbons, lay them over a parchment paper-lined tray and bake them in the preheated oven until golden.

Carefully remove them from the oven, drizzle the 2 Tbsp of olive oil over them and sprinkle them with the spice mix.

Serve the soup in large bowls garnished with the tortilla croutons.


Hummus & Bell Pepper Tortilla Wrap (Vegan)

These homemade tortilla rolls are filled with a smooth and creamy chick pea spread and some sweet roasted red bell peppers. I cannot possibly imagine a finger food platter made without these creamy tortilla rolls, as they are incredibly easy to make and they are the first ones that vanish off the platter. And the reasons are quite simple: they are delicious, hearty and nutritious.

Ingredients (for 2 rolls):

  • 2 large tortillas
  • 1 red bell pepper
  • 1 Tbsp chopped chives

for the hummus:

  • 1 can of chickpeas (400g)
  • 1 Tbsp tahini (I used homemade tahini – here is the recipe)
  • 2 Tbsp lime juice
  • 3 Tbsp olive oil
  • 1 – 2 Tbsp water
  • ¼ tsp cumin
  • 1/8 tsp chili flakes
  • salt to taste

Method:

  1. Roast the red bell pepper. Take a metal disk, place it on the stove and roast the pepper on each side. Place the roasted pepper in a small saucepan and cover with a lid. After 10 minutes carefully peel the pepper. Remove the stem and the seeds, give it a quick wash and pat it dry with a paper towel. Slice it.
  2. Prepare the hummus. Drain the chickpeas using a colander and rinse it under cold water. Take about 8 – 10 chickpeas and gently squeeze them in your fingers to remove their skins. Proceed the same with the rest of the chickpeas – this step is optional.
  3. In the bowl of the food processor add the tahini and the lime juice and pulse until combined.
  4. Drizzle the olive oil 1 Tbsp at a time. Pulse until the mixture resembles to a mayonnaise.
  5. Add the chickpeas and pulse until you form a paste, scraping down the sides of the bowl with a spatula.
  6. Add the spices (cumin, chili flakes and salt). Add 1 Tbsp of water and process. Add more water until you reach the desired consistency. Spoon it into a bowl and drizzle some olive oil on top.
  7. Assemble the wrap. Take both flatbread and place each one on a different square of parchment paper. Divide the hummus between the two flatbreads and spread it into a fine layer. Place half of the pepper slices on one side and sprinkle them with ½ Tbsp of chopped chives. Using the parchment paper, starting from the side with the peppers, start rolling the flatbread as tight as possible. Process the same with the second flatbread and wrap tightly each roll with the parchment paper. Refrigerate for at least 1 hour before slicing.
  8. Serving and leftovers. Slice the wrap into 3cm thick slices and serve. Wrap the leftovers (if any) in cling film and refrigerate for up to 2 days.

Tapenade – olive spread (vegan)

Creamy and flavorful, this olive spread is the answer when you’re in the mood for something delicious but not overly complicated. This olive paste is also quite versatile, it’s absolutely divine spread over fresh bread, it can be rolled into wraps or served as a dip for a plethora of raw vegetables. The technique is as simple as it can be. You press the olives against a wooden board to smash them, you remove the pits and you blend them in the food processor. In the end you season the spread with garlic, capers and salt and you enjoy this delicacy spread over a nice crusty, preferably homemade slice of bread.


Ingredients (for 4 servings):

  • 300g olives (I used 200g black olives and 100g Kalamata olives)
  • 2 Tbsp olive oil
  • 2 tsp capers
  • 1 garlic clove
  • salt to taste

Method:

  1. Remove the pits. For this step I never use pitted olives as they tend to be less flavorful. Smash the olives against the wooden board using a knife. Remove each stone with your fingers.
  2. Pat the olives dry. Place the olives on a paper towel – lined cutting board and cover them with another paper towel. Gently press the olives to remove the excess moisture.
  3. Blend the olives. Place the olive chunks and blend them until you form a chunky spread, adding about 1 tablespoon at a time.
  4. Season. Peel the garlic, place it in a mortar, season it with some salt and smash it with a pestle. Add the capers and smash them as well until you form a paste.
  5. Serveing and leftovers. Add the condiment over the olive paste and give it a few pulses to make sure the spread is homogenous. Place the leftovers (if any) in a bowl, cover with cling film and refrigerate for up to 2 days.

Burger Buns (Vegan)


It would be impossible for me to even try to describe how delicious these homemade buns are. From my point of view, these are the perfect burger buns; they taste amazing and smell absolutely divine, they have a tender, flavorful crust and an elastic, pillowy center. Even though I’m not the typical ‘bread on every meal’ kind of person, I cannot stop at just one bun. These guys are so delicious that I cannot imagine a person who could stop after just one piece. They are simply exquisite. And I just have to tell you a tiny secret: they are vegan. Over and out.

Ingredients (for 20 buns):

  • 450g all-purpose flour + extra 50g for kneading
  • 120ml water
  • 120ml vegan milk (I used almond milk)
  • 2 Tbsp brown sugar
  • 2 Tbsp olive oil
  • 1 satchel active dry yeast
  • egg substitute: 1 Tbsp ground flax seeds + 3 Tbsp water

for the garnish:

  • 2 Tbsp vegan milk
  • ½ brown sugar
  • 2 Tbsp sesame seeds

Method:

  1. Egg substitute. Grind the flax seeds using a mortar and pestle. Add 3 Tbsp of water and leave aside for 5 minutes.
  2. Activate the yeast. Heat the water and the milk in a small saucepan until lukewarm (36 – 38°C). Add the sugar and the yeast and leave aside for 5 minutes. The mixture should be frothy.
  3. Sift the flour. In a large bowl sift the flour and make a well in the center. Add the oil, flax seed mixture and yeast mixture and mix with a fork.
  4. Add the salt. Add the salt and continue mixing with your hands until you form a sticky ball.
  5. Knead the dough. Bring the sticky dough on a floured working surface and knead it for 10 minutes. Use a dough scraper to knead the ball.
  6. Proof. Place the dough in the bowl, cover with cling film and let it rise in a warm place until doubled in size (about 1 hour).
  7. Form the buns. Heat the oven at 400°F/204°C (gas mark 6). After 1 hour, place the dough back on the working surface and knead vigorously to knock out the air bubbles. Divide dough into 20 pieces and shape them into 20 balls (I had 20 balls x 40g).
  8. Rise. Place them on a tray lined with parchment paper and let them rise for about 30 minutes.
  9. Garnish. Mix the milk with the sugar, heat the liquid slightly and give them a quick wash. Sprinkle some black sesame seeds.
  10. Bake. Bake them in the preheated oven for 20 minutes or until golden. Let them cool for 30 minutes before serving.

Source: www.thehealthyfamilyandhome.com


Roasted Red Pepper Pasta (Vegan)

This creamy and spicy roasted pepper pasta are the ideal option on those busy evenings when time isn’t precisely your friend. With some basic organisational skills, this dish is ready in less than 1 hour. While the water boils, the peppers are being roasted and while the pasta is being cooked, the sauce simmers on the stove. I find that pipe rigate are the perfect option for this type of sauce. Once mixed with the sauce, this type of pasta captures the creamy sauce and you get to enjoy that decadent sauce with every bite. Simply amazing…

Ingredients (for 4 servings):

for the sauce:

  • 2 large red bell peppers
  • 360ml almond milk
  • 1 medium red onion
  • 4 garlic cloves
  • 3 Tbsp active dry yeast
  • 1 ½ tsp corn starch
  • 1 ‘bird’s eye’ dried chili
  • salt and pepper to taste

for serving:

  • 350g dry pipe rigate
  • fresh basil leaves
  • active dry yeast

Method:

  1. Pasta. Cook the pasta according to the instructions on the package. Drain them using a colander and cool them under cold tap water. Drain them very well and place them in a large bowl.
  2. Roast the peppers. While the water boils, take a metal disk, place it on the stove and roast the peppers on each side. Place the roasted pepper in a small saucepan and cover with a lid. Proceed the same with the second pepper.
  3. Peel the peppers. Carefully peel each pepper. Remove the stem and the seeds, give them a quick wash and pat them dry with a paper towel.
  4. Onion and garlic. Peel the onion and slice it carefully. Peel the garlic.
  5. Prepare the sauce. Place the milk, onion, garlic and chili in the bowl of a blender. Mix until smooth. Add the peppers, olive oil, corn starch, and dry nutritional yeast and blend until smooth and creamy.
  6. Cook the sauce. Add the sauce to a medium saucepan and simmer it over low-medium heat until thick (for about 7 minutes).
  7. Serve. Add the sauce to the pasta and mix well. Serve in large bowls and garnish with basil ribbons and nutritional yeast.

Source: www.minimalistbaker.com


Quinoa Salad with Arugula and Bell Pepper (Vegan)


I love arugula, as well as I love quinoa. So it was practically impossible for me not to fall in love with this salad while the stars in the recipe are precisely the ingredients mentioned above. When you add to this equation red bell pepper, onion, pine nuts and a sweet and sour citrusy dressing you get a wonderful salad. One of the many reasons I love this salad is its delicious taste and its beautiful color scheme. Also, this salad is so nutritious and filling. It’s simply divine!

Ingredients (for 2 servings):

⦁ 100g uncooked quinoa (1/2 cană)
⦁ 240ml water (1 cană)
⦁ 40g arugula
⦁ 1/2 red bell pepper (100g)
⦁ 1/2 red onion (30g)
⦁ 1 Tbsp pine nuts (15g)
⦁ 2 Tbsp apple cider vinegar
⦁ 1 Tbsp olive oil
⦁ 1/2 Tbsp maple syrup
⦁ zest and juice of 1 orange
⦁ zest and juice of 1/2 lime
⦁ salt and pepper to taste


Method:

  1. Quinoa. Place the quinoa in a strainer and rinse it with cold water for about 1 minute. Drain it very well. Place quinoa in a sauce pan, add 1 cup water and 1/4 tsp sea salt and bring to a boil on high heat. When the water begins to boil, cover with a lid and reduce the heat to minimum. Simmer for 15 minutes. Remove from heat and let it stand covered for 5 minutes. After 5 minutes, fluff it with a fork. Spread it on a plate to cool down faster.
    2. Pine nuts. Carefully brown the pine nuts in a skillet, over medium heat. Set aside to cool.
    3. Pepper and onion. Cube the red bell pepper. Peel the onion and cut it into fine cubs.
    4. Citrus. Grate the peel off the citrus and squeeze the juice.
    5. Dressing and assembly. Prepare the dressing by mixing in a medium bowl the vinegar with the oil and the maple syrup. Add the zest and the citrus juice and mix. Add the onion, bell pepper and the arugula and stir. Finally add the quinoa and mix well. Garnish with toasted pine nuts.
    6. Leftovers. Place the leftovers (if any) in a bowl, cover with cling film and refrigerate for up to 2 days.

Source: Forks over Knives, pag 62

Maroccan Semolina Bread – Khobz dyal Smida (Vegan)

I simply love to make bread, I find the science behind it fascinating and I cannot think of a better therapy than kneading the dough with my bare hands. But my adventurous side keeps me from repeating the same old recipes over and over again, so every fortnight I came up with new and exciting recipes. Some of them leave me as soon as I rest my head on the pillow but others refuse to leave my side. It’s been more than three years since I discovered this delicious Maroccan semolina bread and I turn to it every month ever since. It’s one of the easiest bread recipe I’ve ever made and the taste is simply amazing. It has a lovely thin crust and a pillowy and chewy center. I must confess that although I’m deeply fond of all my bread recipes, this one has a special place in my heart.

Ingredients:
⦁ 180ml lukewarm water
⦁ 1 tsp sugar
⦁ 1 tsp active dry yeast
⦁ 200g semolina
⦁ 170g all-purpose white flour
⦁ 1 Tbsp olive oil (15ml)
⦁ 1 tsp salt


Method:

1. In a small bowl combine water, sugar and yeast and let aside for 10 minutes. After 10 minutes, the mixture should be foamy.
2. In a large bowl sift together the white flour, semolina and salt and make a well in the center. Add the yeast mixture and the olive oil and mix with a wooden spatula until you form a ball.
3. Bring the dough on a floured working surface and knead it for 5 minutes. After 5 minutes, the dough should be smooth.
4. Place dough on the semolina-powdered working surface, cover with a clean towel and let it relax for 10 minutes.
5. After 10 minutes using a rolling pin, roll the dough in a 1 cm thick disc and place it on a parchment paper – lined tray. With a sharp blade score the surface in a diamond pattern. Cover with the same towel and let it rise for 45 – 60 minutes. Preheat the oven at 400°F/204°C (gas mark 6).
6. When the bread has doubled its thickness place the tray in the preheated oven and bake for 25 minutes or until golden brown.
7. Let the bread cool down on a wire rack for about 1 hour before slicing it.

Source: www.landsandflavors.com

Pesto alla Genovese (Vegan)

One of the most famous Italian sauces is undoubtedly pesto alla genovese, a sauce made by smashing together 5 ingredients: fresh basil, olive oil, garlic, pine nuts and cheese (a mix of parmigiano regiano and pecorino romano). The traditional way of making this amazing sauce requires a mortar and a pestle, its name comes from the Italian verb pestare (= to beat). Pesto alla genovese has a great taste, it’s definitely not shy nor delicate, it has lots of bold flavors which complement each other beautifully.

Ingredients:

⦁ 3 Tbsp olive oil (45ml)
⦁ 25g basil leaves
⦁ 1 garlic clove
⦁ 1 Tbsp pine nuts (10g)
⦁ 1 Tbsp nutritional yeast (5g)
⦁ 1/4 tsp salt

Method:

1. Wash the basil in cold water and pat it dry with paper towels.
2. In the mortar, crush the clove of garlic with about 1/4 tsp of salt until the garlic has softened.
3. Begin adding basil leaves about 1/4 of the quantity a time.
4. Add the oil one teaspoon at a time, stirring continuously.
5. Add the pine nuts and crush them as well.
6. Add the nutritional yeast and mix until combined.
7. Serve immediately or store in an airtight container. Refrigerated, it will keep up to one week.

Source: ricette.giallozafferano.it

Grilled Zucchini Salad with Spring Onion and Feta Cheese


I’ve never tried in my whole life a side dish that tastes better than this simple zucchini salad. But this simple salad isn’t a bland, ordinary salad. Not at all! Those thin zucchini slices are charred on the grill just enough to enhance their flavour, then dressed with a herbal-lemony sauce and garnished with fresh and tangy feta crumbles. This amazing side dish doesn’t take more than 20 minutes and the result is so charmingly rustic but exquisite. A fresh summer salad that tastes simply awesome!

Ingredients (for 4 servings):

  • 4 small zucchini
  • 4 Tbsp olive oil
  • 2 Tbsp lemon juice + zest of 1/2 lemon
  • 2 spring onions
  • 10 mint leaves
  • 10 basil leaves
  • 80g feta cheese
  • salt to taste

Method:

  1. Cut the zucchini. Wash the zucchini and pat them dry. If you use organic zucchini, leave their skin on. If your zucchini aren’t organic, peel them. Place them on a wood board and slice them in 1/2 cm thick slices.
  2. Grill the zucchini. Heat the grill over high heat. Arrange the zucchini slices in one layer and grill them until charred (for about 2 minutes). Carefully turn them on the other side and continue grilling for about 1 minute.
  3. Prepare the veggies and herbs. Wash the spring onions and slice them finely. Grate the lemon zest. Chop the basil and mint.
  4. The dressing. In a large bowl mix the olive oil with the lemon juice. Add the spring onions, lemon zest, basil and mint. Add the grilled zucchini slices and mix well. Crumble feta cheese on top and season with salt.
  5. Leftovers. Place the leftovers (if any) in a bowl, cover with cling film and refrigerate for up to 2 days.

Source: www.weightwatchers.

Homemade Noodles with Sauteed Cabbage (Vegan)

My heart fills with joy when I remember my grandmother’s recipe of cabbage noodles, those fragrant and peppery noddles she used to make for me every Friday afternoon. I used to barge into the kitchen, throwing my backpack on the old, wooden armchair and she used to greet me with a warm smile and a simple bowl of cabbage noodles. That’s all I’ve ever needed, for that matter!

For these delicious noodles with sauteed cabbage you only need about a handful of budget-friendly ingredients and a spare 20 minutes. If you decide to make the noodles from scratch, it shouldn’t take more than 1 hour. For this recipe I used my pasta machine but a simple rolling pin and a sharp knife did the job brilliantly for years (and the proof lays here). Whenever I make them plant-based, I replace the eggs with olive oil and lukewarm water. Since I can’t say I find pale noodles appealing, I add a pinch of turmenic to the flour, which gives the noodles a lovely golden color. So let’s get to work!

Ingredients (for 4 servings):

for the pasta:

  • 300g all purpose flour
  • about 160ml liquid (115ml water + 45ml olive oil)
  • 1 + 1/2 tsp salt
  • 1/2 tsp turmenic


for the sauteed cabbage:

  • 1/2 kg white cabbage
  • 1/2 Tbsp salt
  • 3 Tbsp vegetable oil
  • 1 medium onion
  • 1 tsp pepper


Method:

  1. Pasta dough. In a large bowl sift the flour. Add salt and turmenic and mix well.
  2. Make a well in the center, add water and olive oil and mix with a fork, until you form a ball of dough.
  3. Bring the dough on a floured working surface and knead it vigorously for 10 minutes, or until the surface becomes smooth and elastic.
  4. Wrap it in cling film and let it rest in the refrigerator for 30 minutes.
  5. Sauteed cabbage. Take the cabbage and discard its outer leaves. Give it a wash and pat it dry with a paper towel.
  6. Cut it in 4 and chop it finely. Place the cabage ribbons in a colander and place the colander in a large bowl. Sprinkle the salt over the cabage and masaage it for a minute.
  7. Cut the onion in half and slice it finely. Heat 2 Tbsp of oil in a large saucepan over medium heat. Add the onion and saute it until translucent.
  8. Remove the liquid from the cabbage ribbons using your hands. Add the cabbage to the saucepan, give it a stir, cover with a lid and reduce the heat to minimum. Saute the cabbage until tender (for about 15 – 20 minutes). When it becomes tender, season with salt (only if necessary) and plenty of black pepper and leave aside.
  9. Cutting the noodles – If you don’t own a pasta machine, you can use a rolling pin to roll the dough and a sharp knife to cut the noodles, like I did in this recipe. Take the dough out from the fridge, cut it in 4 and form 4 balls of dough. Take 1 ball, flatten it with your fingers and fold it in half. Set your pasta machine to the thickest setting and feed it through the pasta roller. Repeat the step. Change the setting to mark 2. Fold this piece of dough into thirds, and press it with your fingers. Pass it through the pasta machine. Repeat the step. Continue passing the dough through the machine until the desired thickness. For these noodles I like to stop after the 5th mark.
    Recap: fold, mark1x2, fold, mark2x2, mark3x2, mark4x2, mark5x1
  10. Run each sheet of pasta through the pasta cutter.
  11. Take a large pot, fill it with water and add a handful of salt. Cover with a lid and let it boil. When the water starts to boil, put the noodles into the pan and let them cook for about a minute and a half (90 seconds). Drain pasta and rinse them with cold water. Toss them over the sauted cabbage and give it a gentle stir.
  12. Serve immediately.